
Installing Nexus artifact repository
If you're using e.g. Maven and you're working in a team, you might consider setting up your own artifact repository. This way you can exchange artifacts in your team, but also using it as a proxy so it is not necessary for every Maven installation to download artifacts from the Internet.
In this tutorial I will first discuss the installation by hand, afterwards the installation using a self-build Debian package and finally the configuration of Nexus.
The installation by hand I only wrote for the deeper understand how the installation and basic configuration works in general. But I really recommend to use the installation by Debian package, as it not only makes the installation process easier, it also solves the problem of performing updates. And Sonatype releases at least once a month a new version. So... 😉
The tutorial seems to be quiet long at first, but that is due to the fact that I made a lot of screenshots to guide everyone through the process. So don't worry.
In the following example I'm using the Nexus Repository Manager v3.27.0-03 running on Ubuntu Linux 18.
- Installation by hand
- Installation by Debian package
- Configuration
- Maven configuration
- Conclusion
- Sources
Installation by hand
For installing Ubuntu Linux 18 see the Installing Ubuntu 18 tutorial.
Attention! Make sure that you don't use the username Nexus for the root user as use that name later for the Nexus's system user.
Attention! Ensure that the virtual machine has at least 3 GB of virtual memory as Nexus will claim 2,703 MB (~2.63 GB) by default.
It is also recommended to have 4 virtual CPU cores, also Nexus runs with less.
As Nexus needs at least 64k of file descriptors, we have to modify the limits. Please have a look at the tutorial Increase file descriptors how you can configure that.
Next we download the Unix TAR version of the Nexus Repository Manager. You'll find the link for the download section at Sonatype in the Sources section.
The Nexus v3.27.0-03 needs at least Java 8. So we make sure that we have installed that.
root@machine~# apt-get install openjdk-8-jre
root@machine~# java -version
openjdk version "1.8.0_265"
OpenJDK Runtime Environment (build 1.8.0_265-8u265-b01-0ubuntu2~18.04-b01)
OpenJDK 64-Bit Server VM (build 25.265-b01, mixed mode)
The version and build number of Java depends on which Java you installed and when - as Ubuntu constantly updates the Java package. So take the output above just as a reference.
Using, e.g., WinSCP we copy the file nexus-3.27.0-03-unix.tar.gz in the folder /tmp.
root@machine~# cd /opt
root@machine:/opt# tar xfvz /tmp/nexus-3.27.0-03-unix.tar.gz
root@machine:/opt# ln -s nexus-3.27.0-03 nexus
The layout will be like:
root@machine:/opt# ll
total 16
drwxr-xr-x  4 root root 4096 Sep 10 20:14 ./
drwxr-xr-x 22 root root 4096 Sep 10 10:58 ../
lrwxrwxrwx  1 root root   15 Sep 10 20:14 nexus -> nexus-3.27.0-03/
drwxr-xr-x  9 root root 4096 Sep 10 20:14 nexus-3.27.0-03/
drwxr-xr-x  3 root root 4096 Sep 10 20:14 sonatype-work/
/opt/nexus-3.27.0-03- containing the Nexus repository manager./opt/nexus- a version independent link to the folder of the Nexus repository manager./opt/sonatype- the folder containing the files of the repository.
Start Nexus
Now we start the Nexus by hand as application.
root@machine~# cd /opt/nexus/bin
root@machine:/opt/nexus/bin# ./nexus run
WARNING: ************************************************************
WARNING: Detected execution as "root" user.  This is NOT recommended!
WARNING: ************************************************************
Now you should see the startup of Nexus. You also will see this in the log file.
After you see the following message the system has finally started and is ready to use.
-------------------------------------------------

Started Sonatype Nexus OSS 3.27.0-03

-------------------------------------------------
The web user interface can now be opened by http://[NEXUS-ADDRESS]:8081/, where [NEXUS-ADDRESS] has to be replaced by the IP address or DNS name of your Ubuntu machine.
Now you can continue with the configuration.
You can stop the application by pressing CTRL+C.
Nexus as a service
In the previous section we started Nexus as an application, but of course we want to have it as a service.
First we have to create an user for the service. The Nexus will later run using that user.
root@machine~# adduser --system --no-create-home --group nexus
root@machine~# chown nexus:nexus -R /opt/nexus /opt/nexus-3.27.0-03 /opt/sonatype-work
root@machine~# nano /opt/nexus/bin/nexus
We have to add the following line (best after the INSTALL4J_JAVA_PREFIX="" and GREP_OPTIONS="" lines):
NEXUS_HOME="/opt/nexus"
This will tell Nexus were to find its files.
root@machine~# nano /opt/nexus/bin/nexus.rc
Now we have to uncomment the first line and add a second line:
#run_as_user=""
run_as_user="nexus"
This will tell Nexus which Linux user it should use to run.
Nexus makes use of the Java preference store And as our user doesn't have a home directory, it will complain that it can't store the preferences. This will flood the log with error message and you might not see really important ones thanks to that.
So we edit the file /opt/nexus-3.27.0-03/bin/nexus.vmoptions:
root@machine~# nano /opt/nexus/bin/nexus.vmoptions
And add the following lines at the end:
# Additional options
#
# Nexus makes use of the Java preference store. But the Nexus user doesn't have
# a home directory. Therefore we set the Java user root directory to the Nexus
# data directory. This will create a .java folder in this directory for storing
# the preferences.
# Otherwise the log will be flooded by error message like this:
#    java.util.prefs.BackingStoreException: Couldn't get file lock.
#    Could not lock User prefs.  Unix error code 2.
-Djava.util.prefs.userRoot=../sonatype-work/nexus3
This will store the preferences in the /opt/sonatype-work/nexus3 on which the Nexus user has access.
Finally we have to create the service file.
root@machine~# nano /etc/systemd/system/nexus.service
And we fill it with the following content:
[Unit]
Description=nexus service
After=network.target

[Service]
Type=forking
LimitNOFILE=131072
ExecStart=/opt/nexus/bin/nexus start
ExecStop=/opt/nexus/bin/nexus stop
User=nexus
Restart=on-abort

[Install]
WantedBy=multi-user.target
This ensures that the service is started after the network is available. It is also defines - again - that we use some file descriptors (64k are needed, by I went to 128k in this case). You also see the start and stop command as well as the user it should use.
Now we have to tell Ubuntu Linux that we have a new service. Afterwards we enable that service and start it:
root@machine~# systemctl daemon-reload
root@machine~# systemctl enable nexus.service
root@machine~# systemctl start nexus.service
If the service works correctly can be determined by having a look at its log file:
root@machine~# tail -f /opt/sonatype-work/nexus3/log/nexus.log
Configure the web path
Like described in the installation manual for the first node (see the link in the Sources section) we can modify the web path of Nexus using the following file:
NEXUS_HOME/etc/nexus.properties
In our case this is the file
/opt/sonatype-work/nexus3/etc/nexus.properties
We modify that file:
root@machine~# nano /opt/sonatype-work/nexus3/etc/nexus.properties
In this example we change the path from / to /nexus/, means the URL for accessing the web user interface will change to http://[NEXUS-ADDRESS]:8081/nexus/.
# Jetty section
# application-port=8081
# application-host=0.0.0.0
# nexus-args=${jetty.etc}/jetty.xml,${jetty.etc}/jetty-http.xml,${jetty.etc}/jetty-requestlog.xml
nexus-context-path=/nexus/

# Nexus section
# nexus-edition=nexus-pro-edition
# nexus-features=\
#  nexus-pro-feature
#
# nexus.hazelcast.discovery.isEnabled=true
#
Finally we need a restart so the change takes effect:
root@machine~# systemctl restart nexus.service
Configure the web port
If you want to use a port above 1024 you simply can edit the configuration file mentioned in the previous section.
Ports below can only be used by services running as root. But there is a workaround using iptables
root@machine~# apt-get install iptables-persistent
A dialog will pop up asking Save current IPv4 rules? and Save current IPv6 rules?. Answer Yes in both cases.
Now we route e.g. port 80 to port 8081. Means every connection from outside on port 80 on our Ubuntu Linux machine will be routed internally to port 8081, where our Nexus service accepts connection. This also means that Nexus will be still available on port 8081 as well.
In this example we use the network interface eth0, but it depends on the network configuration of your Linux machine.
root@machine~# iptables -t nat -A PREROUTING -i eth0 -p tcp --dport 80 -j REDIRECT --to-port 8081
Finally we save the configuration:
root@machine~# iptables-save > /etc/iptables/rules.v4
This ensures that the routing will also be active the next time we start the system.
The web user interface of Nexus should now be available using:
http://[NEXUS-ADDRESS]/nexus/
A restart of the Nexus service is not needed as it is not related to this modification.
Installation by Debian package
For installing Ubuntu Linux 18 see the Installing Ubuntu 18 tutorial.
Attention! Make sure that you don't use the username Nexus for the root user as use that name later for the Nexus's system user.
Attention! Ensure that the virtual machine has at least 3 GB of virtual memory as Nexus will claim 2,703 MB (~2.63 GB) by default.
It is also recommended to have 4 virtual CPU cores, also Nexus runs with less.
As Nexus needs at least 64k of file descriptors, we have to modify the limits. Please have a look at the tutorial Increase file descriptors how you can configure that.
If you want to access Nexus on a port below 1024, you may also configure the web port (which is independent from the Debian package in this case).
Creating the Debian package
Head over to the example Maven project on GitHub:
Read the README.md and follow the instructions.
Installing the Debian package
Copy the Debian package file from the target folder (e.g. nexus_3.27.0-03_all.deb) to the /tmp folder of your Linux machine.
Install the package:
root@machine~# apt-get install /tmp/nexus_3.27.0-03_all.deb
If you haven't installed the openjdk-8-jre package yet, apt-get will do that for you as the Nexus package has a dependency on that. If Java is installed because of that dependency, it is also removed when you remove Nexus via apt-get remove nexus or apt-get purge nexus. Maybe you have to execute apt-get autoremove so the Java package is removed.
After the installation you should be able to access the Nexus web user interface:
http://[NEXUS-ADDRESS]:8081/nexus/
Now you should proceed with the configuration (see the next section).
Configuration
Please open the web user interface. The right URL is based on the basic configuration of Nexus. In case you used the Debian package it should be:
http://[NEXUS-ADDRESS]:8081/nexus/
If you have configured the web port you also can use:
http://[NEXUS-ADDRESS]/nexus/
In both cases [NEXUS-ADDRESS] by the IP address or DNS name of your Linux machine at which you installed Nexus.
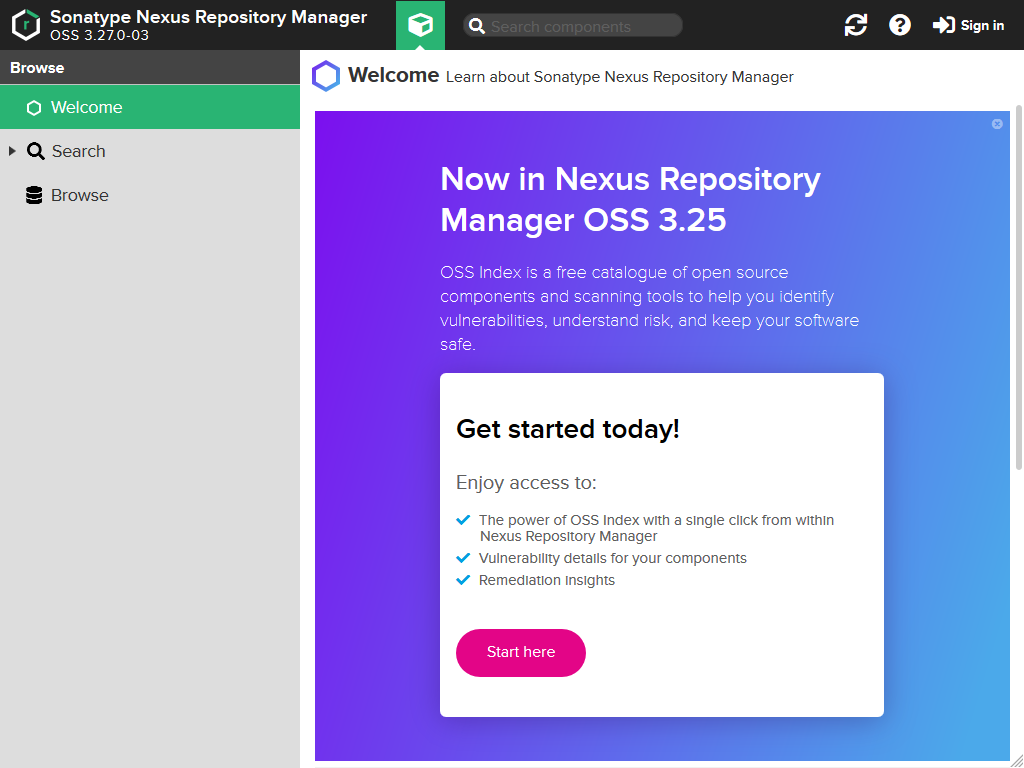
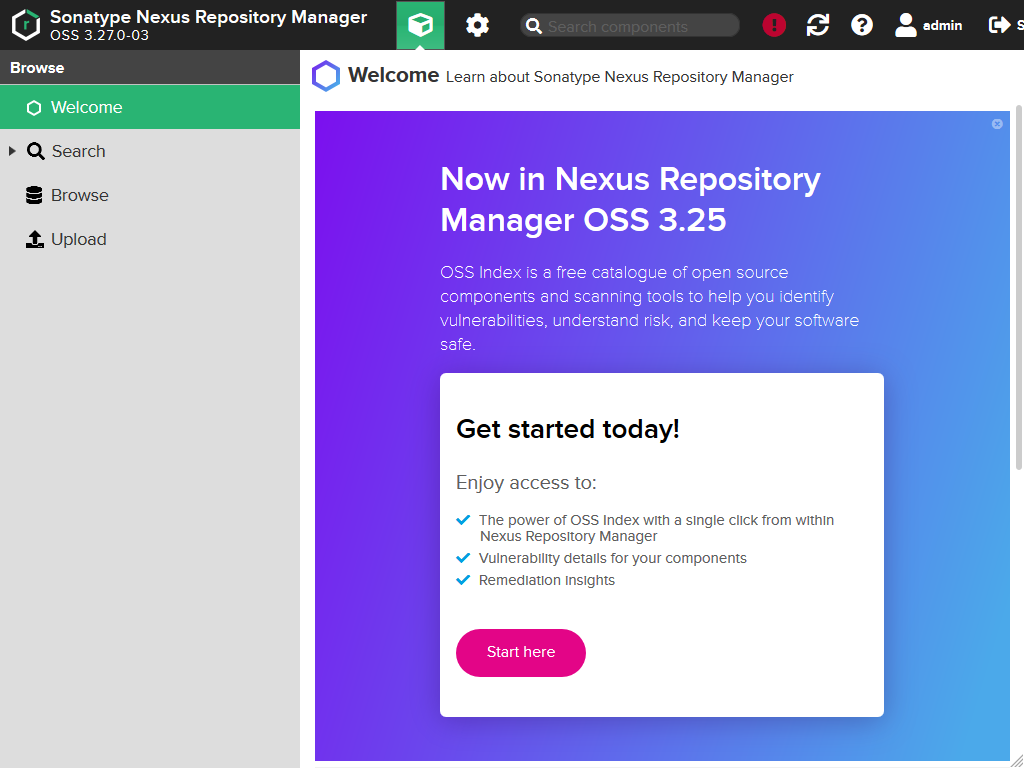
You should see the following in your web browser:
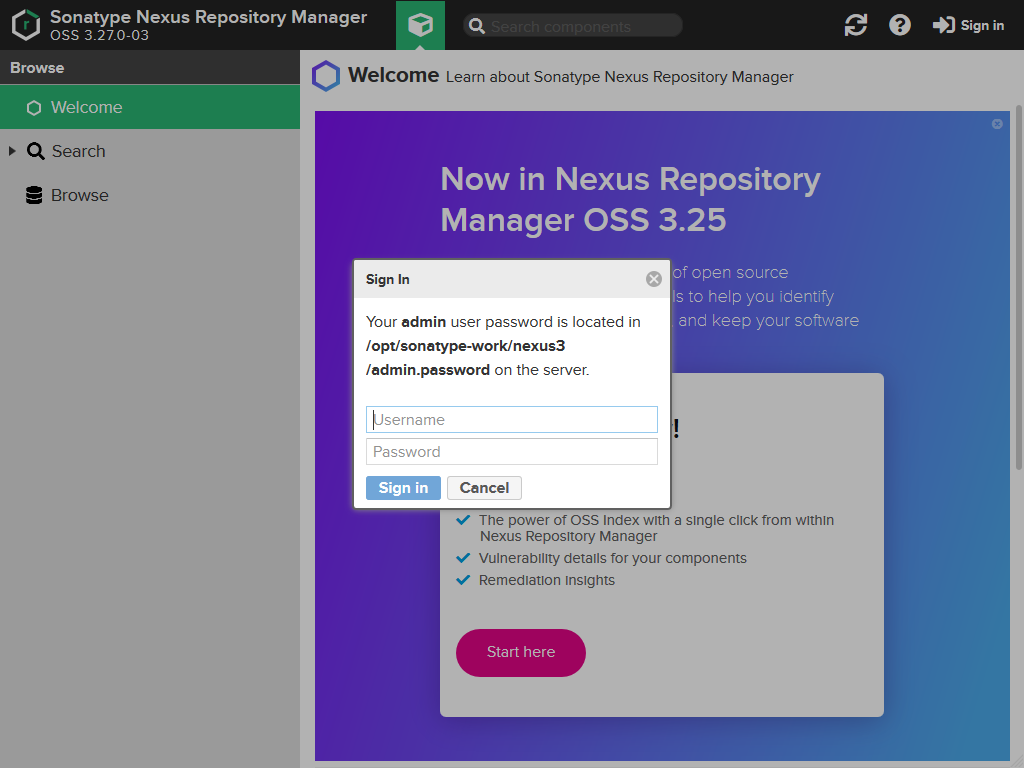
You can login as administrator by clicking the Sign in button on the upper right side.
In older versions of Nexus the name of the administrator user was admin and the default administrator password was admin123. But it seems they changed in the meantime. The username is the same, but the password has to be obtained from the file /opt/sonatype-work/nexus3/admin.password (Don't press CTRL+C in the console if you have started Nexus as an application, but open a second console for accessing that file. Pressing that key combination will stop Nexus).
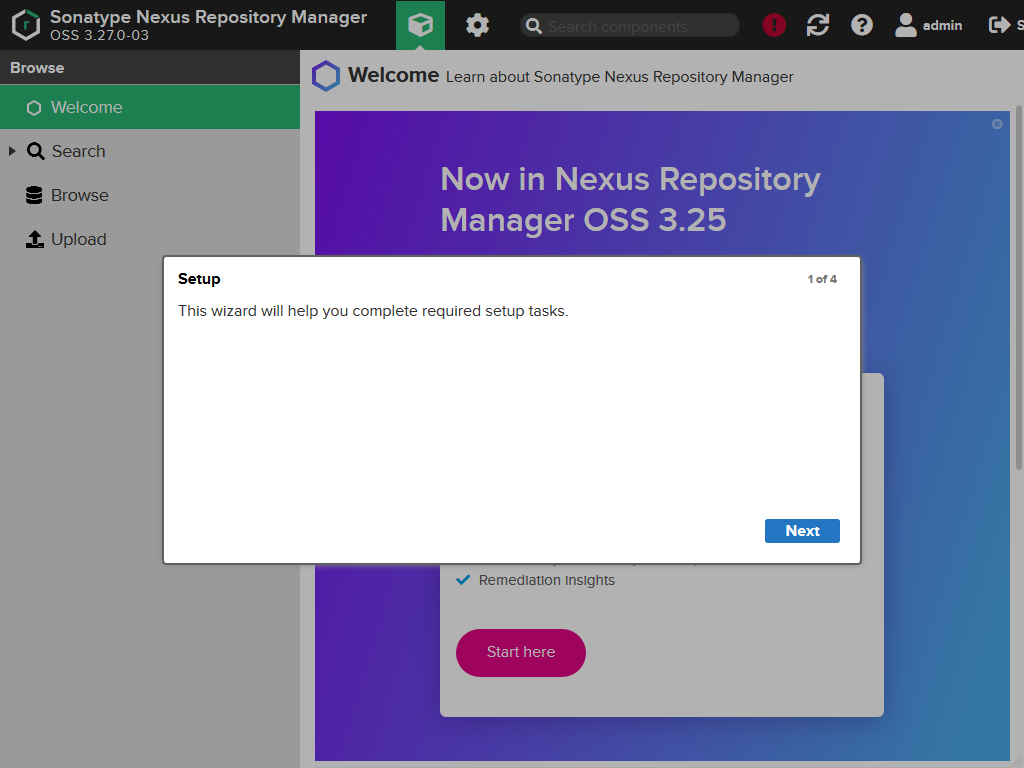
Nexus will start the wizard for the initial configuration.
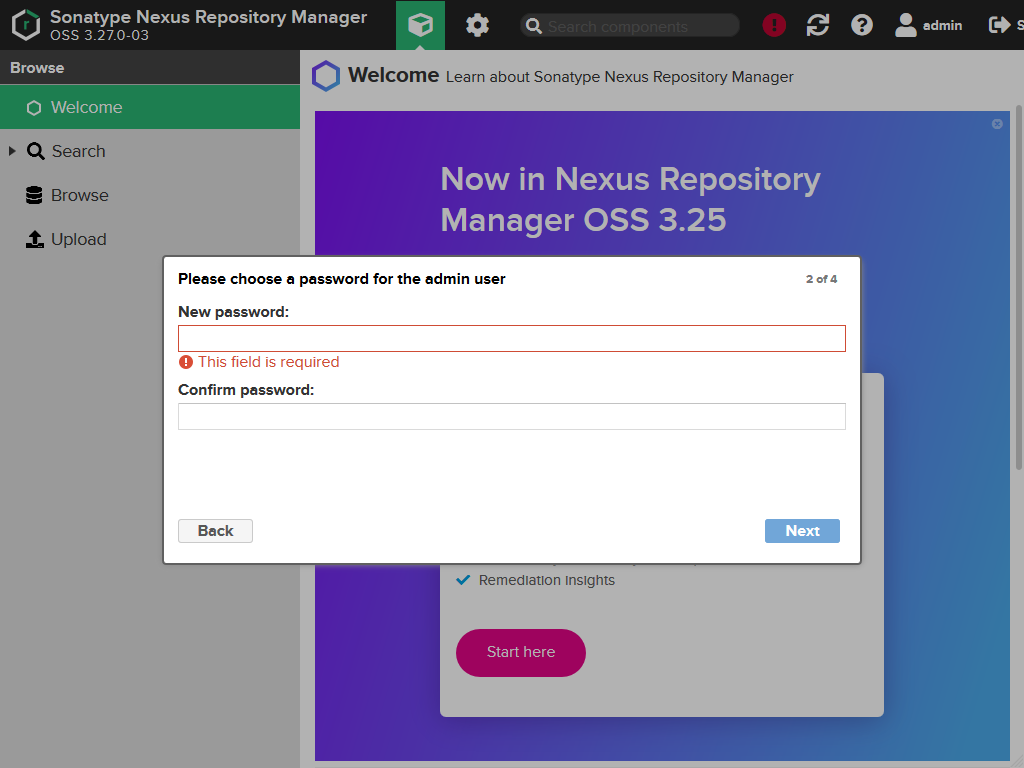
First you have to change the password for the administrator user.
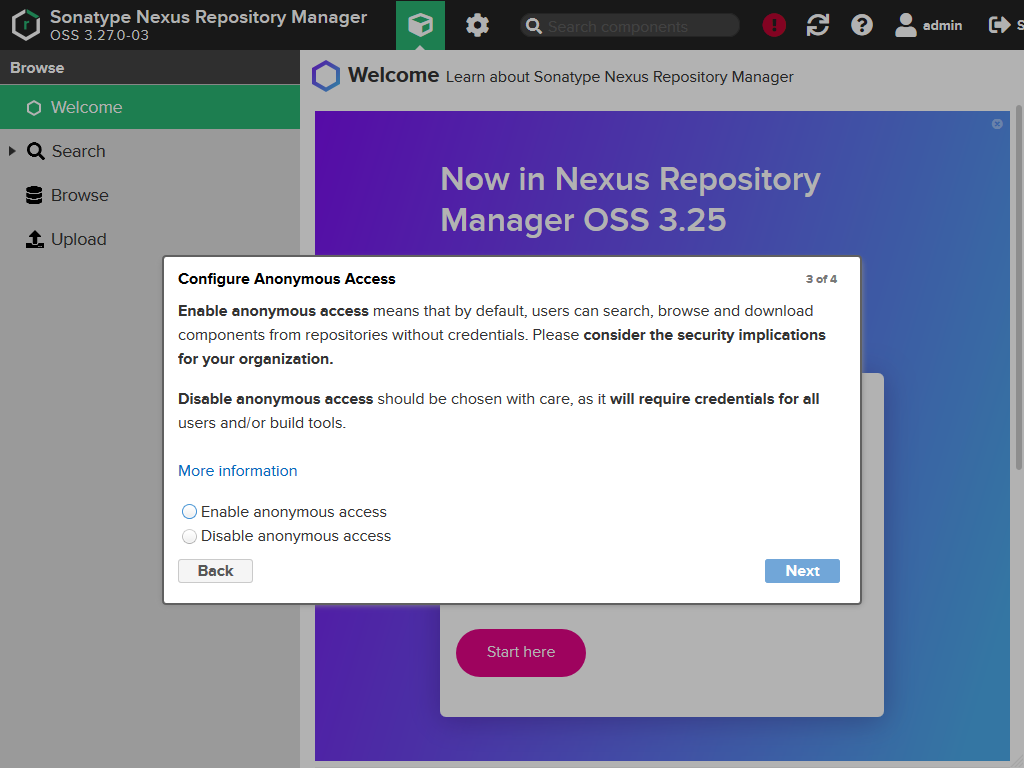
Second you have to choose if anonymous access should be enabled. I always enable it because my Nexus installations are running within the company's network and shouldn't be accessible from outside. In addition developers shouldn't need to always login, even if they are just searching for an artifact. But it is up to you, your security requirements and the security policy of your company.
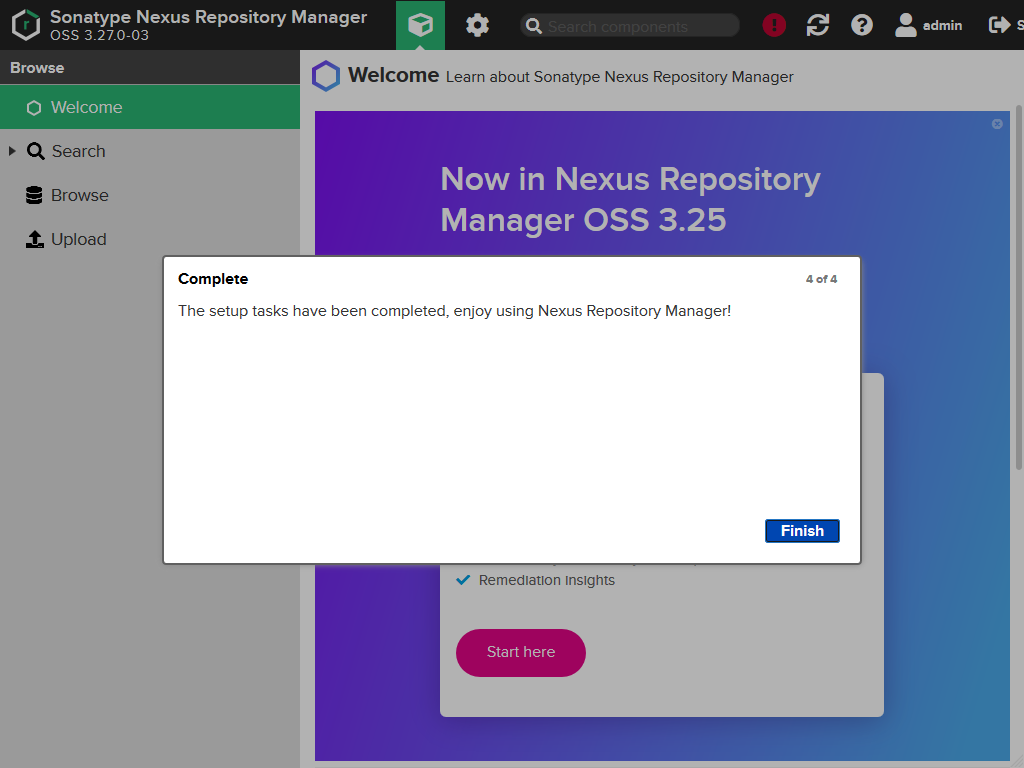
And that's all for the initial configuration.
Attention! Don't be bothered by the red exclamation icon on the top. That is just because I did the screenshots on a VMware ESXi server who had only 2 cores. 😉
Now press the gear wheel on the top (the tool-tip will say Server administration and configuration if you put your mouse over it), so the settings will open.
You should see the settings now:
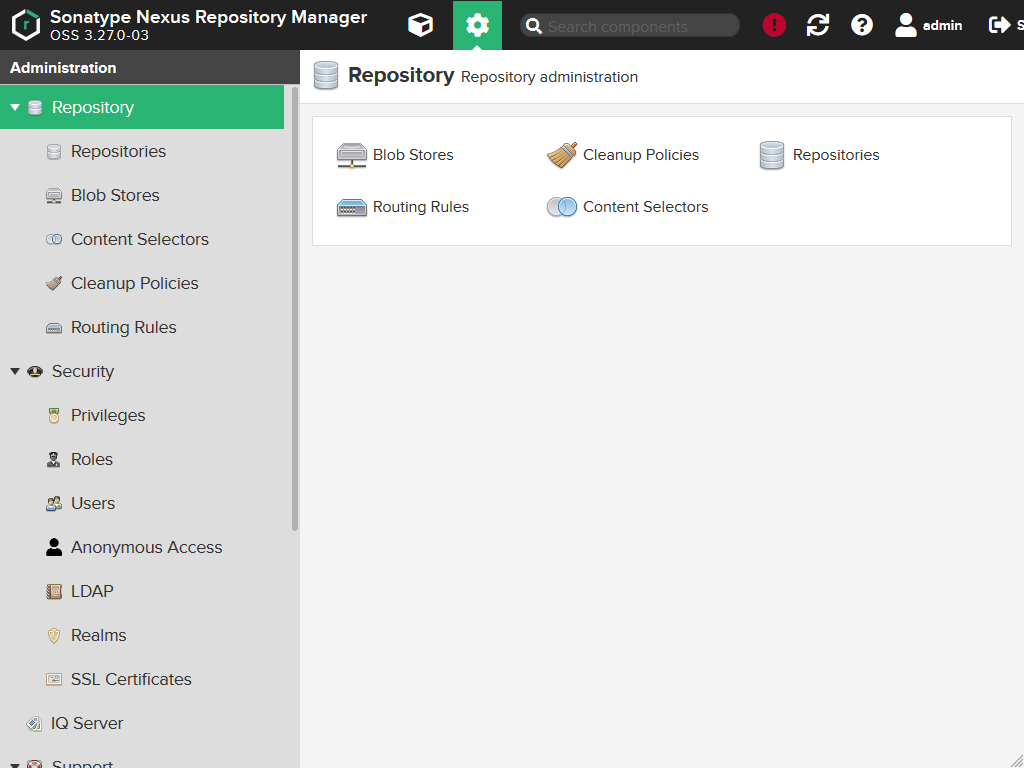
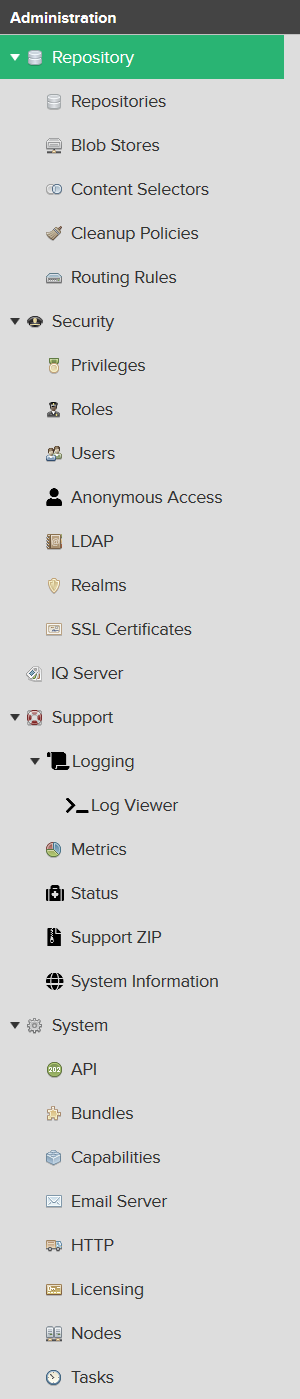
The complete menu should look like this (Of course depending on the version you have installed). A tool-tip is available for every menu item.
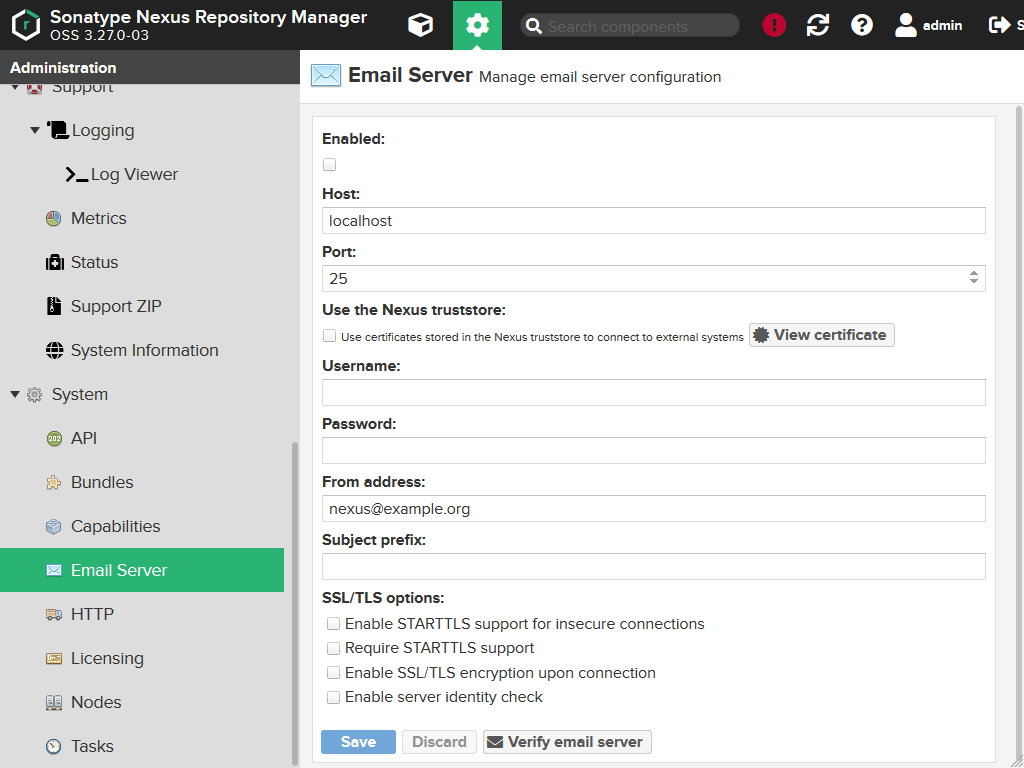
EMail Server
Now open System > Email Server. Enter the data for connecting Nexus to your mail system. This will be used to inform about events. Also I have to admit I can't remember ever received an email from my Nexus installations. 🤔
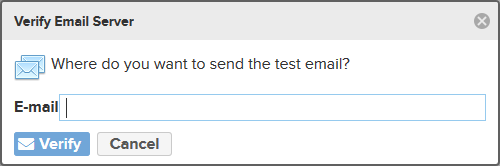
When you press the Verify email server, Nexus will ask for an email address it should use for the test-mail. Enter a valid address and press Verify.
After a few seconds you should get the following message.

You also should get a test mail at the email address you specified having the title Email configuration verification (with Subject prefiy you configured) and the content Verification successful.
Now press the Save button. You get the following message.

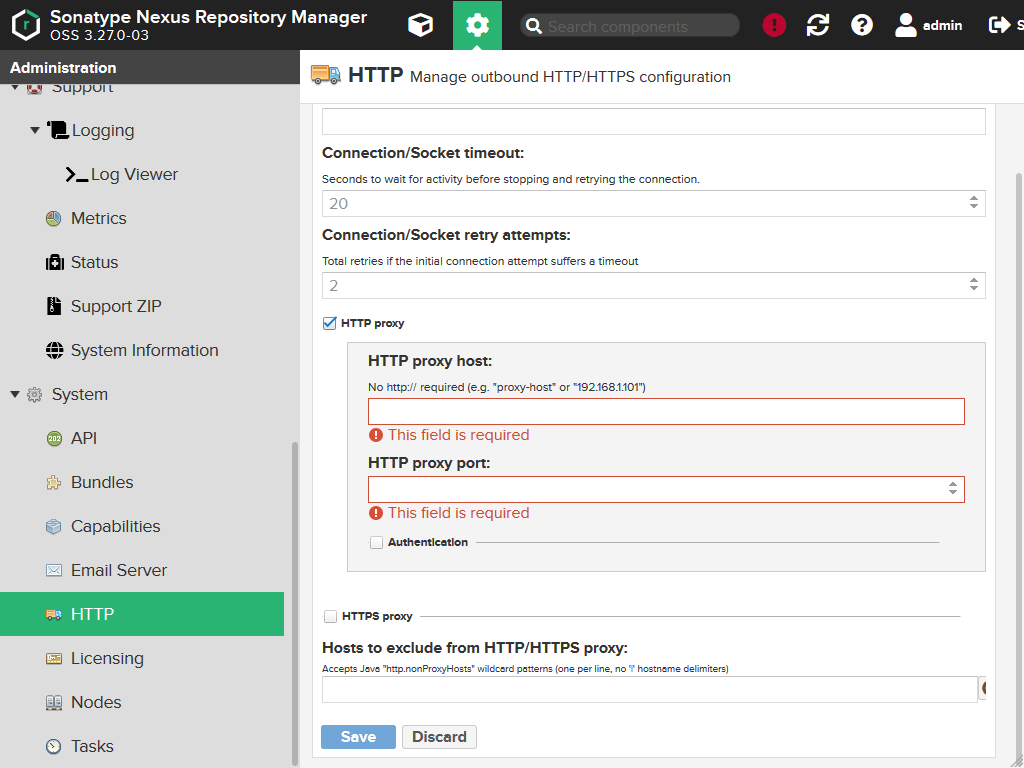
HTTP
The Nexus repository manager will open HTTP connection into the Internet for obtaining central artifact repositories. Therefore you can configure those# connections when you open System > HTTP.
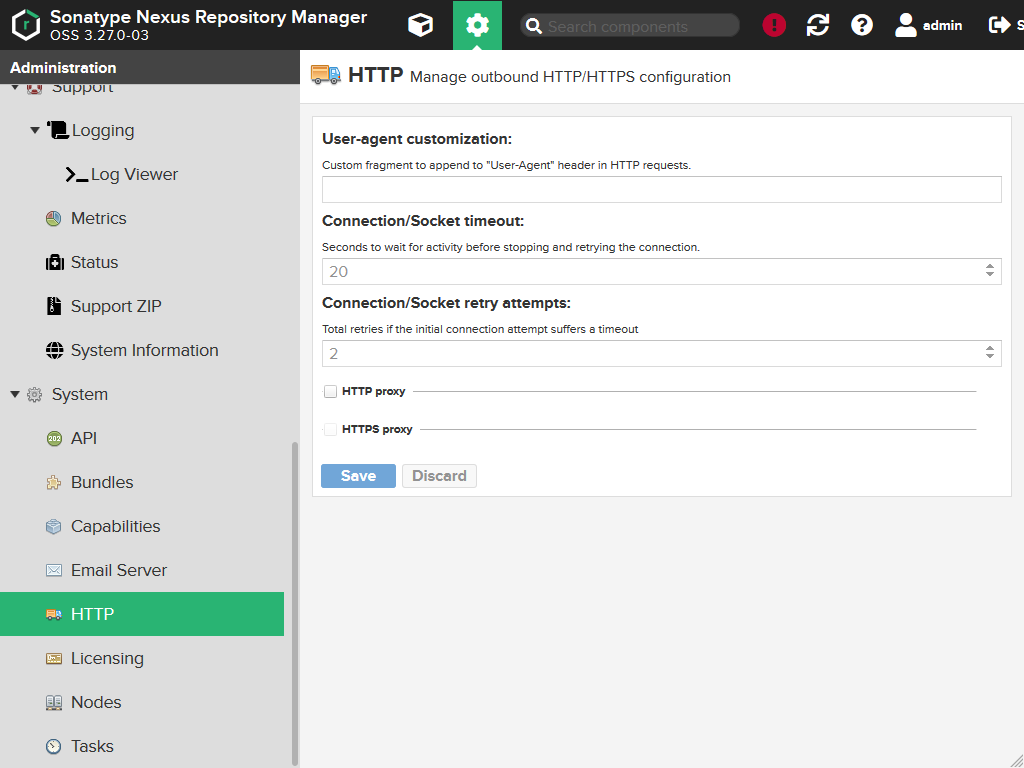
If have a HTTP(s) proxy, you also can configure that here.
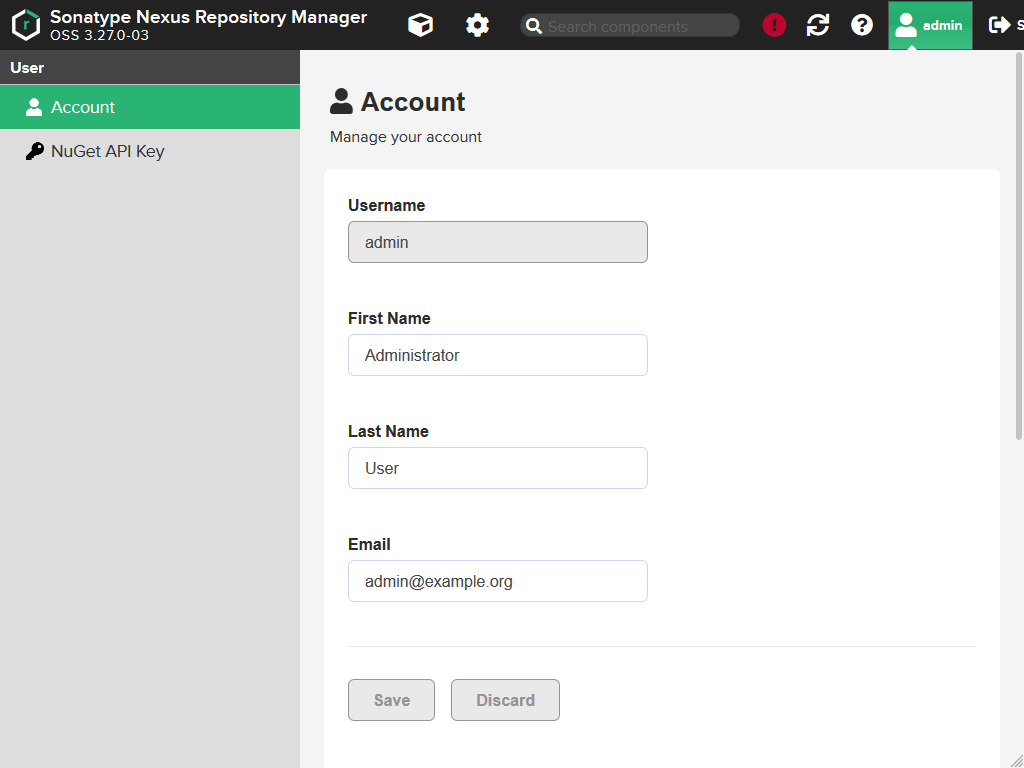
Administrator
Click on the person icon having Admin written to the right (Tool-tip: Hi, admin. Manage your user account). The name will always be the name of the user currently logged-in and open its profile.
You can change the name of your user (means first name and last name) and more important: The email address. When you change one of the settings the buttons should switch from gray to blue and you can click them.
After saving successfully you get a notification.

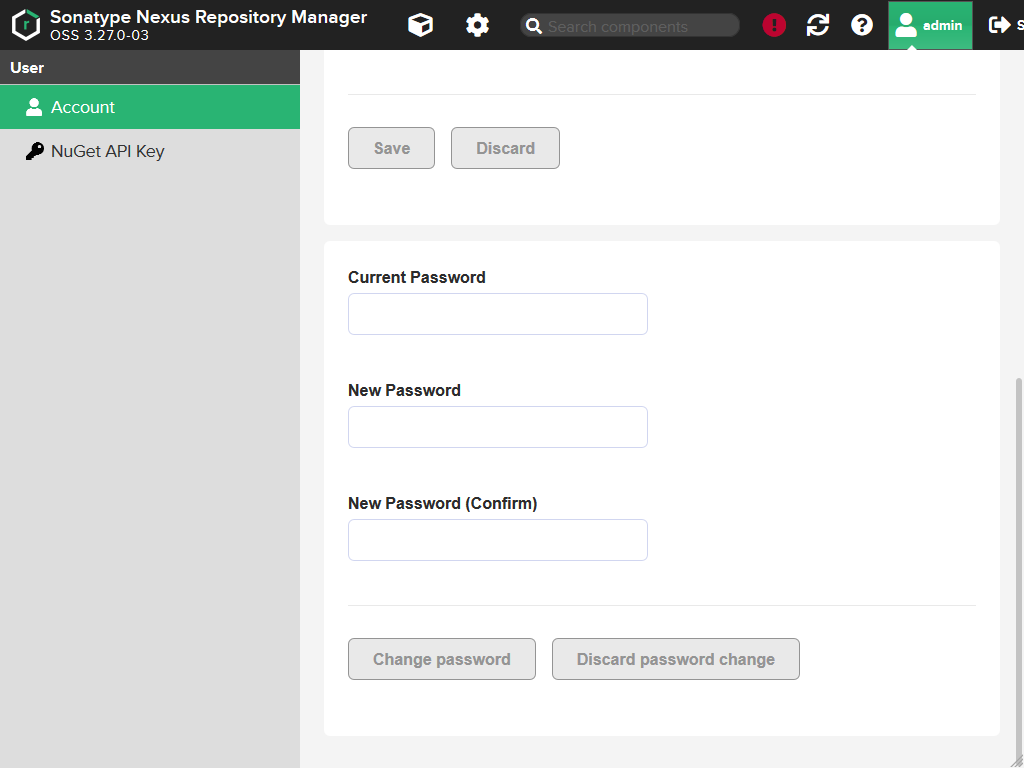
If you scroll down a little bit, you also get a form for changing the password. We already did that in the initial configuration, so we skip that.
LDAP
We go back to the settings of the system and select Security > LDAP.
Most companies have a LDAP server (e.g. Microsoft Active Directory) in which they already manage all the users. Nexus can also use that directory to manage users.
If you don't have a LDAP server yet, but want to set one up, how about having a look at the tutorial Installing OpenLDAP?
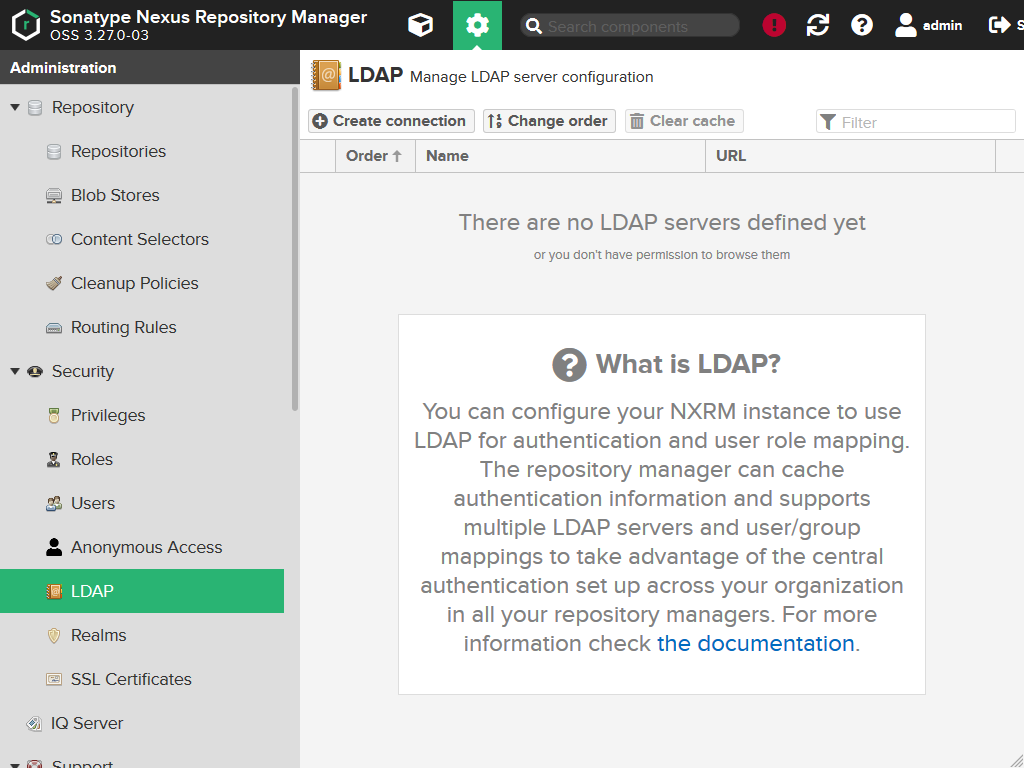
So let's create a connection by clicking the Create connection button.
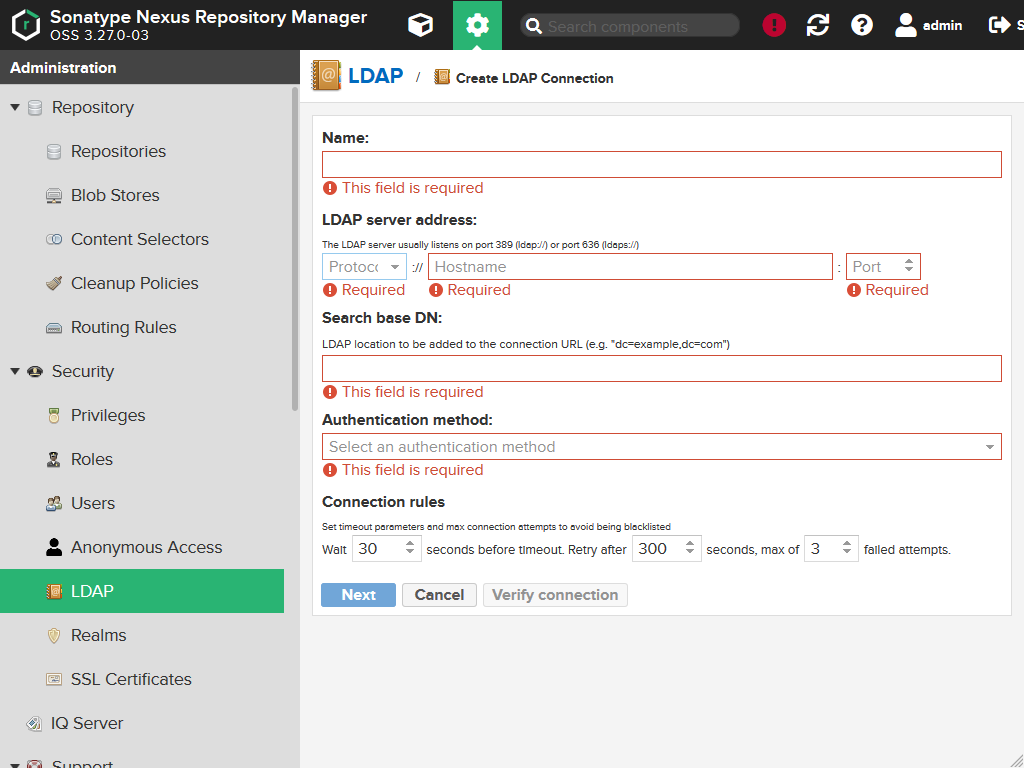
| Field | Description |
|---|---|
Name |
The name of the connection which can be freely chosen. |
Protocol |
The protocol to use: LDAP or LDAPS |
Hostname |
The hostname (IP address or DNS name). |
Port |
The port (e.g. 389 for LDAP or 639 for LDAPS). |
Search base DN |
The point in the directory from which on Nexus should look for users. Let's say you're using a Microsoft Active Directory and your domain is mycompany.local. In most cases the base DN should be DC=mycompany,DC=local. You can enter the root of your directory as it will be limited later on (e.g. if all your developers are in one organizational unit within the directory tree). |
Authentication |
You can select between the following authentication methods: - Simple Authentication - Anonymous Authentication - DIGEST-MD5 - CRAM-MD5 In most cases Simple Authentication should be the right choice. If you select that option you get two additional fields (see next screenshot). |
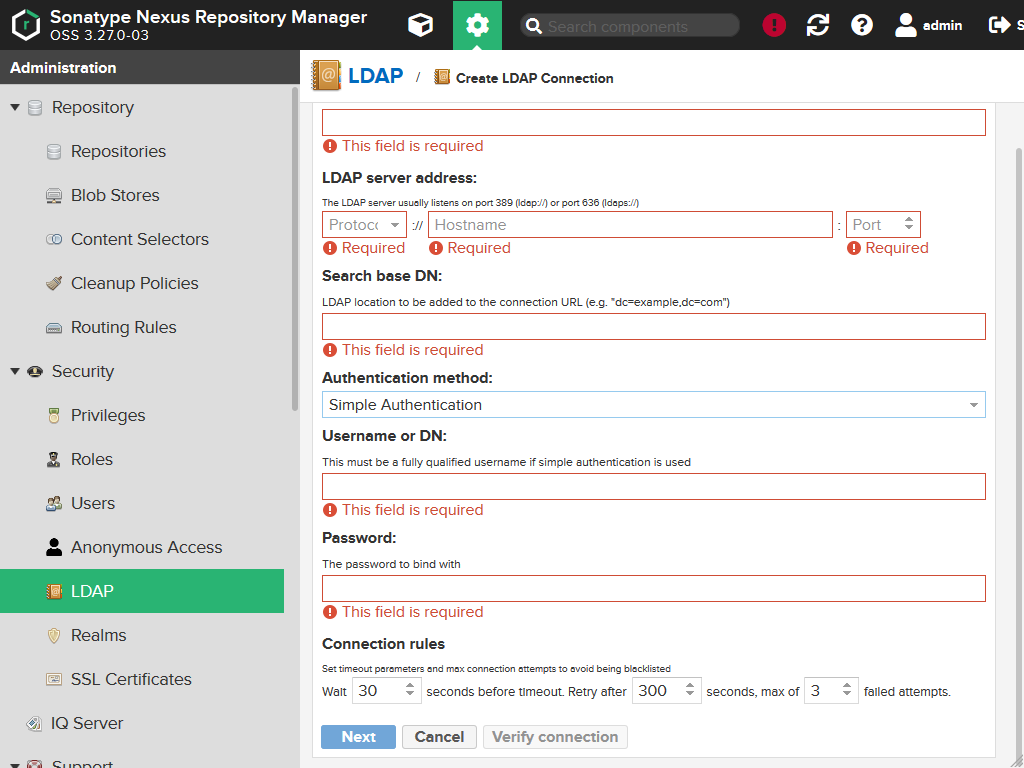
If you select Simple Authentication you get the following two additional fields:
| Field | Description |
|---|---|
Username or DN |
This field is for the user you're planning to use for the connection to the directory. I recommend configuring some extra user for Nexus in the LDAP / Active Directory as attempts with wrong credentials may lead to a disable user account. And you don't want to other systems or services to be affected by that. 😉 That DN can be, e.g., CN=nexus,DC=mycompany,DC=local. |
Password |
This field simply contains the plain password of that user. |
After you filled out everything, press the Verify connection button to test your configuration. The following notification should pop up:

The press the Next button.
This will take you to the Choose Users and Groups page. Here you define how entries in your LDAP / Active Directory should be mapped to users and roles in Nexus.
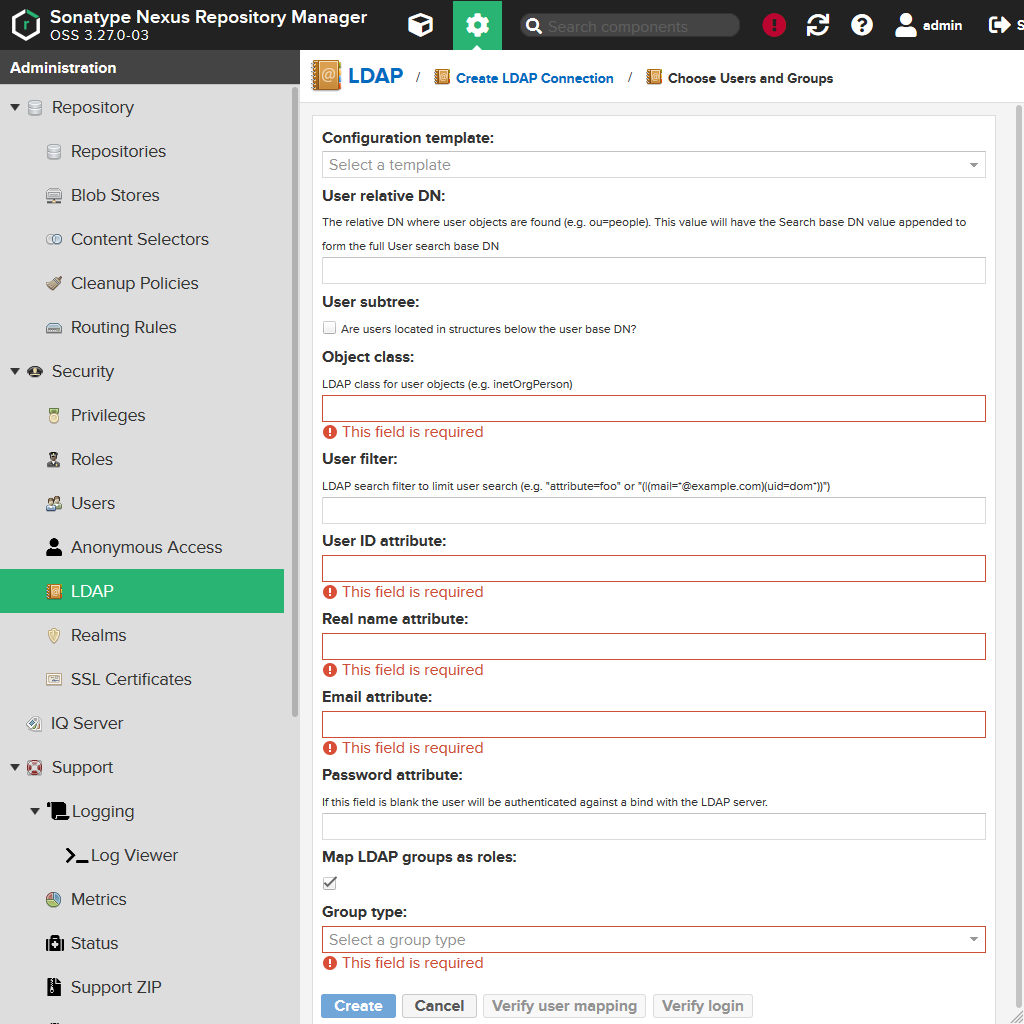
| Field | Description |
|---|---|
Configuration template |
You can choose one of the following: - Active Directory - Generic Ldap Server - Posix with Dynamic Groups - Posix with Static Users If you select one of them, this will fill out the fields for you. |
User relative DN |
Here you can specify a relative DN (relative to the base DN we defined earlier). Nexus will only look for users within that path. The default for Microsoft Active Directory is CN=users. If your base DN would be DC=mycompany,DC=local, this would result in CN=users,DC=mycompany,DC=local in the entry point for searching for user entries. |
User subtree |
This flag specifies if Nexus should also look in sub elements of the specified path (e.g. CN=development,CN=users,DC=mycompany,DC=local). |
Object class |
Specifies which kind of objects Nexus should look for. Typically that is the class user for Microsoft Active Directory and the class inetOrgPerson for a generic LDAP server. |
User filter |
Using this field you can specify any kind of filter for the LDAP search (e.g., additional classes, field values). |
User ID attribute |
The unique value which is used for the user's name (e.g. j.doe. This shouldn't change. Typically that is the attribute sAMAccountName for Microsoft Active Directory and the attribute uid for a generic LDAP server. |
Real name attribute |
Contains the name of the attribute containing the real name of the user (e.g. John Doe). Typically that is the attribute cn for Microsoft Active Directory as well as a generic LDAP server. Note: Nexus will split the value into first name and last name (Nexus itself used two fields for the real name). If the value doesn't contain a whitespace, it will use the whole value as the first name. |
Email attribute |
Contains the email address of the user (e.g. j.doe@mycompany.com). Typically that is the attribute mail for Microsoft Active Directory as well as a generic LDAP server. |
Password attribute |
This field should normally left blank, so the user's authentication at the Microsoft Active Directory / LDAP server is used. |
In the next section we will configure user roles in Nexus. Those roles can also be imported from the LDAP server if the flag Map LDAP groups as roles is enabled.
I have never used it, so I disable it always.
You can select one of the following values for the field Group type:
Dynamic Groups(which is also the default for Microsoft Active Directory)Static Groups
If you select Dynamic Groups you get the following additional fields:
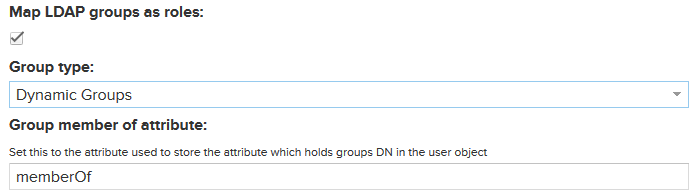
The field Group member of attribute specifies the attribute which contains the group memberships. Typically that is the attribute memberOf for Microsoft Active Directory.
If you select Static Groups you get the following additional fields:
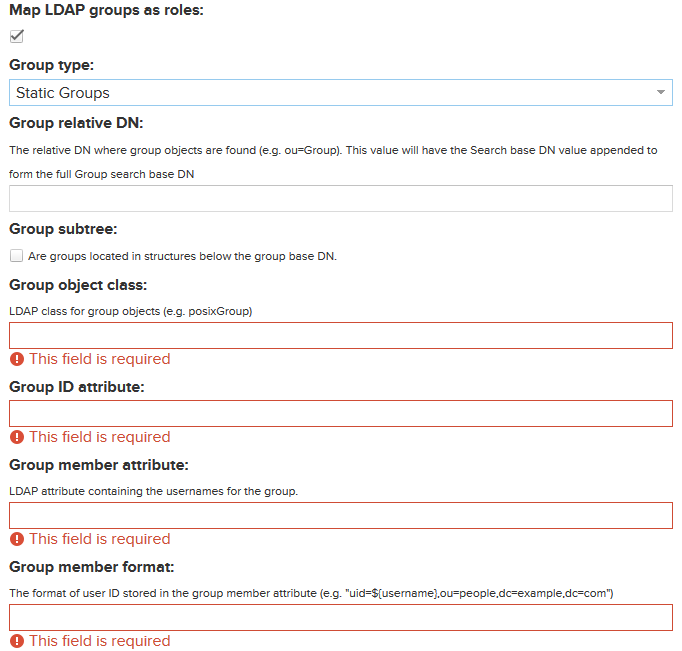
The fields are similar to the field for the user mapping.
| Field | Description |
|---|---|
Group relative DN |
Contains the relative DN to the base DN for the groups. |
Group subtree |
The flag specifies if also sub trees of that path should be processed. |
Group object class |
Contains the class a group object must inherit to be recognized as a group. |
Group ID attribute |
Contains the attribute which contains the group's unique ID. |
Group member attribute |
Contains the attribute which contains the group members. |
Group member format |
Specifies in which format the group members are stored in the Group member attribute. |
When you finished configuring the mapping, you should press the Verify user mapping button. You will get a notification:

And you also will get a list of users who have been found by Nexus using the mapping (the list may be not complete).
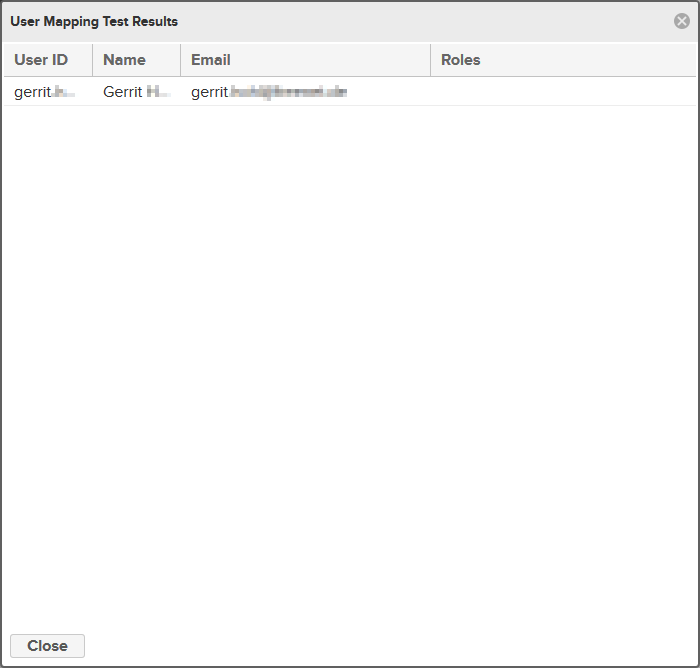
Close that window and click on Verify login. A dialog will pop up asking for an user and a password.
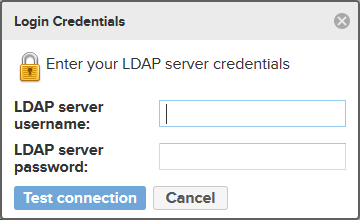
Enter the user (e.g. j.doe) and the corresponding password.
Press the Test connection button and you should get the following notification:

Now we finally have configured the LDAP connection. Press Create to create it. You should get the following notification (openldap in this case is the name of the connection I specified in the Name field):

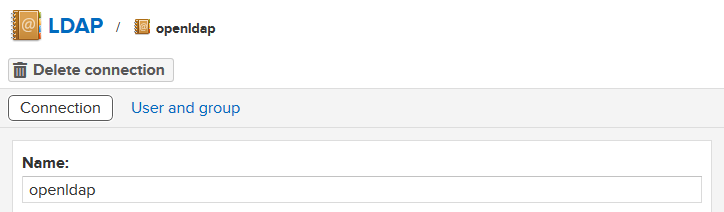
You should be able to see the LDAP connection in the list. If you have several connections you also can specify in which order they should be queried for user and group information. If you want to modify or delete an entry, simply click on it.
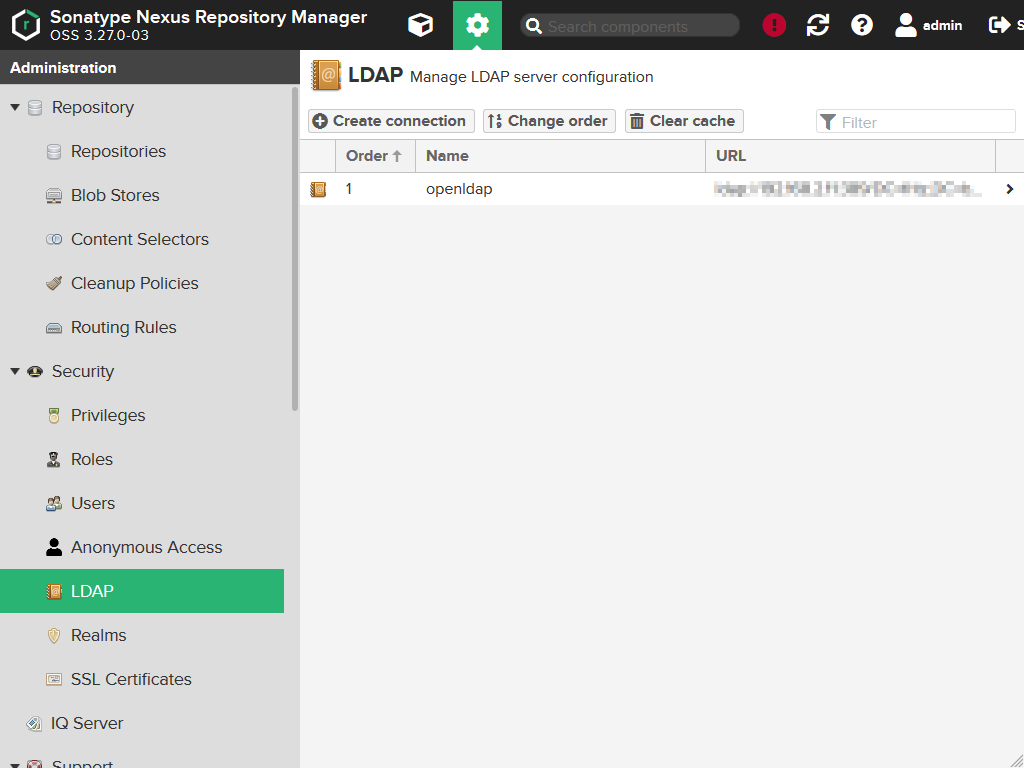
There you'll find the Connection settings on the first tab, the User and group mapping on the second tab as well as a Delete connection button for deleting the currently displayed connection.
Roles
Roles are much like groups. They grant special rights or privileges to the user who have that role.
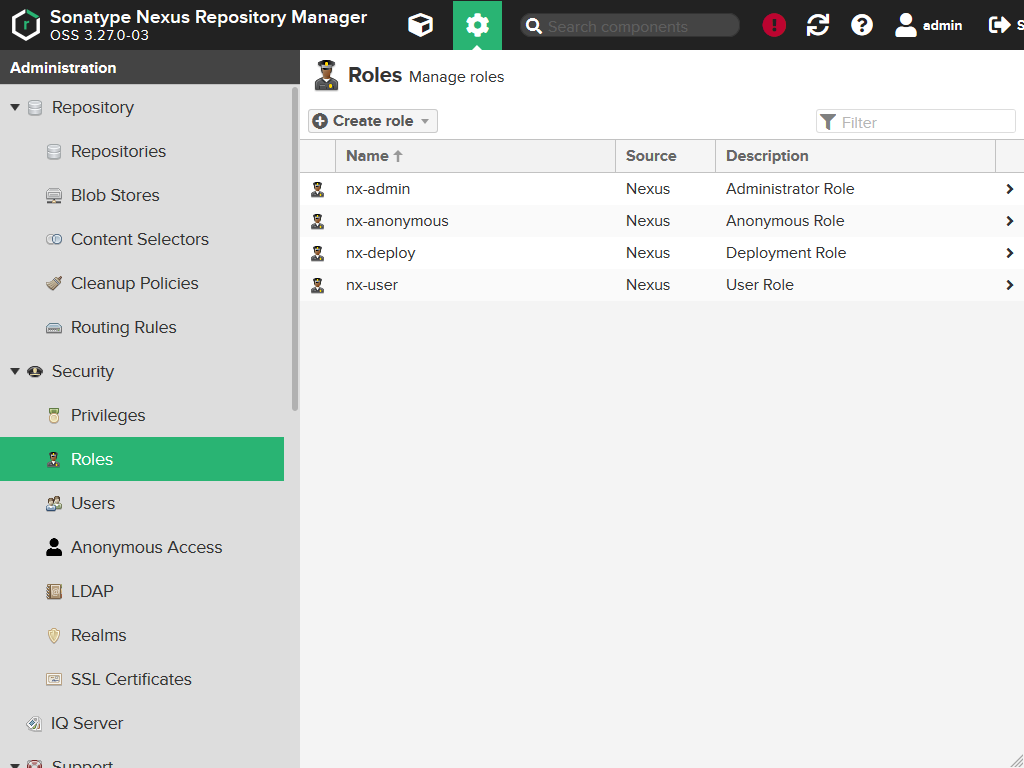
Go to Security > Roles. You will see the following:

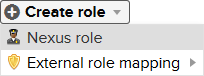
Press the Create role, then select Nexus role.
You should find yourself in the following mask:
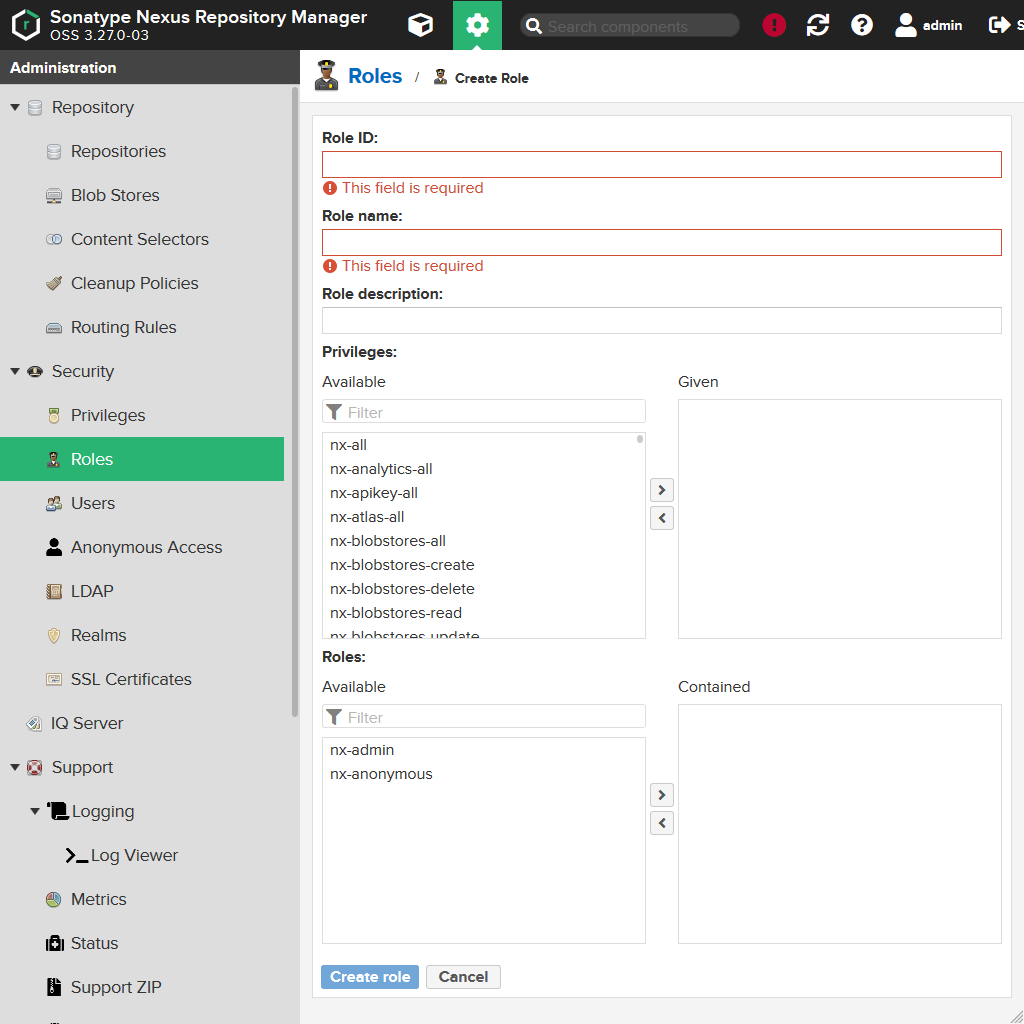
| Field | Description |
|---|---|
Role ID |
Contains the ID of the role which shouldn't be changed later on. |
Role name |
Contains the human readable name of the role. |
Role description |
Contains a description of the role. |
Privileges |
Here you can select which privileges the role should grant to its owners. |
Roles |
Here you can define which roles should be included into this role (like in Microsoft Windows groups can include other groups). |
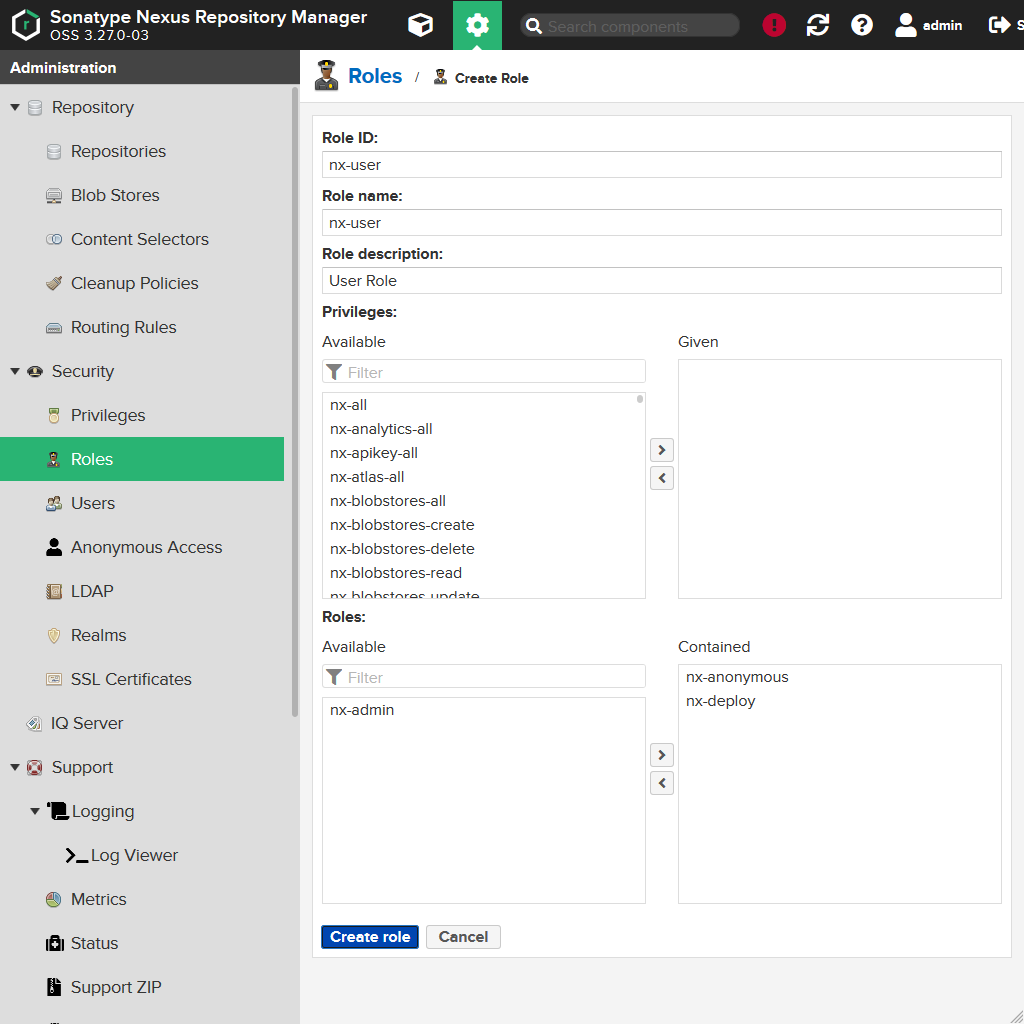
Now create a role having the following values:
| Field | Value |
|---|---|
Role ID |
nx-deploy |
Role name |
nx-deploy (yeah, not very creative...) |
Role description |
Deployment Role |
Privileges |
nx-repository-view-*-*-* (you can enter that in the Filter field, so Nexus will narrow the list down to that privilege) |
Roles |
No roles. |
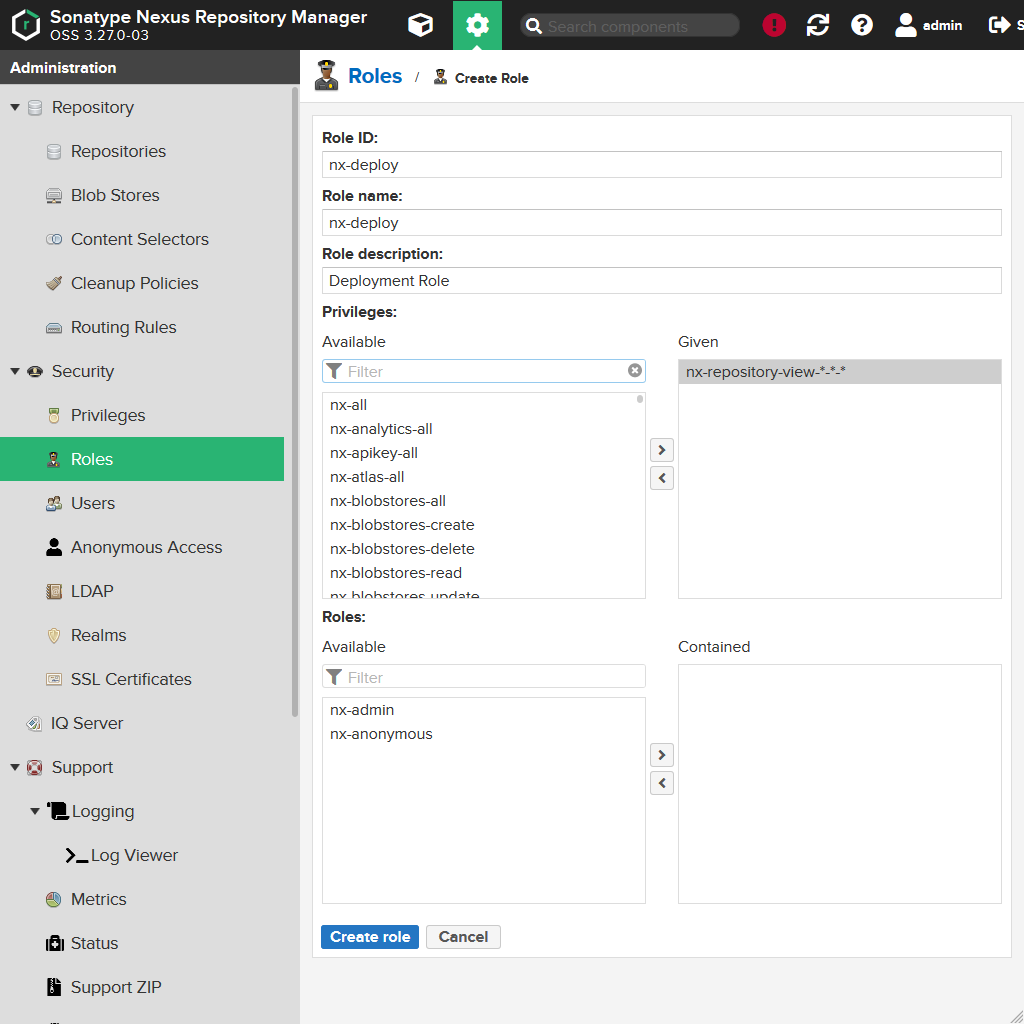
Press the Create role button. You will get the following notification:
And you should see our newly created role in the list of roles. We will assign that role later to all users who should be able to deploy artifacts to the repository. Maybe you want to limit that e.g. only to the user of your build server.

Now create another role:
| Field | Value |
|---|---|
Role ID |
nx-user |
Role name |
nx-user |
Role description |
User Role |
Privileges |
No privileges. |
Roles |
nx-anonymous and nx-deploy |
Create that role.
This will be our default user role. As you may have noticed: We added the nx-deploy role. This means everyone who has the nx-user will also be able to deploy artifacts to the repository. If you don't want that, you have to remove that role from the nx-user role.
Now you should see 2 additional roles in the list.
Users
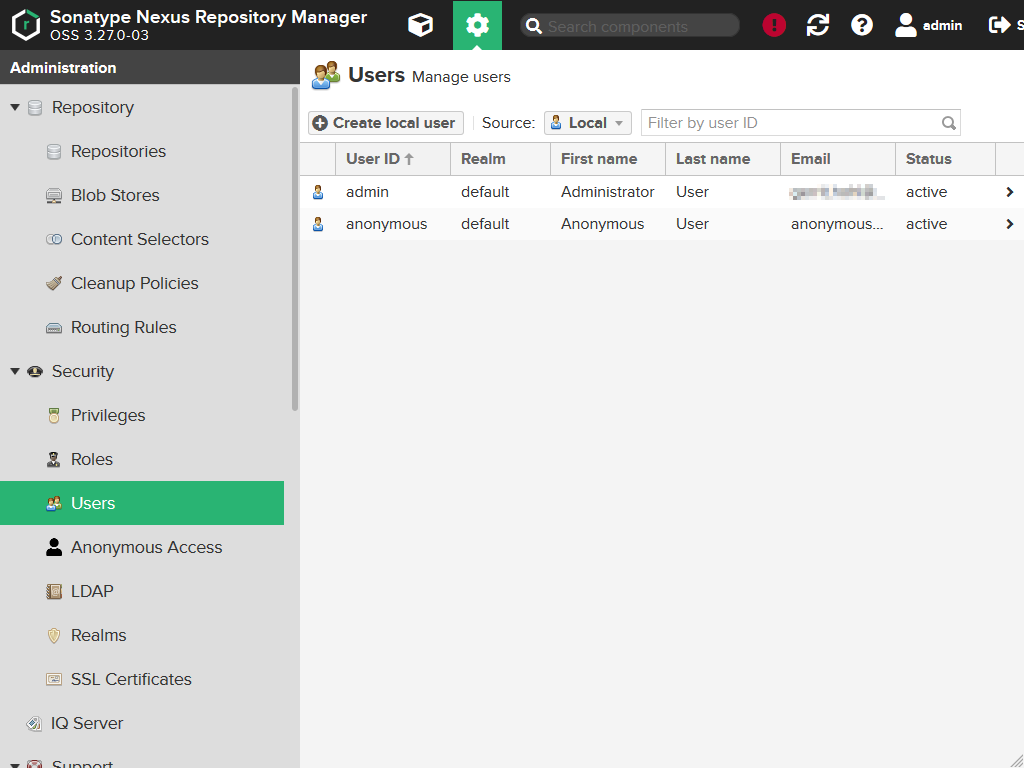
Let's had over to Security > Users. Initial the list contains only two users: The administrator and the anonymous user (which is a pseudo for all users who didn't log-in).
Using the Source button you can filter the list for the different sources of the users.
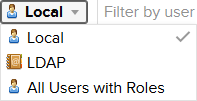
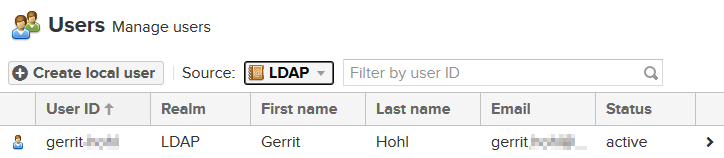
For the Source LDAP you're list may look like this (depending on which user you used for your user mapping test when configuring the LDAP connection).
Maybe you need an user who is not part of your LDAP / Microsoft Active Directory. In that case press the Create local user button and the following form will appear:
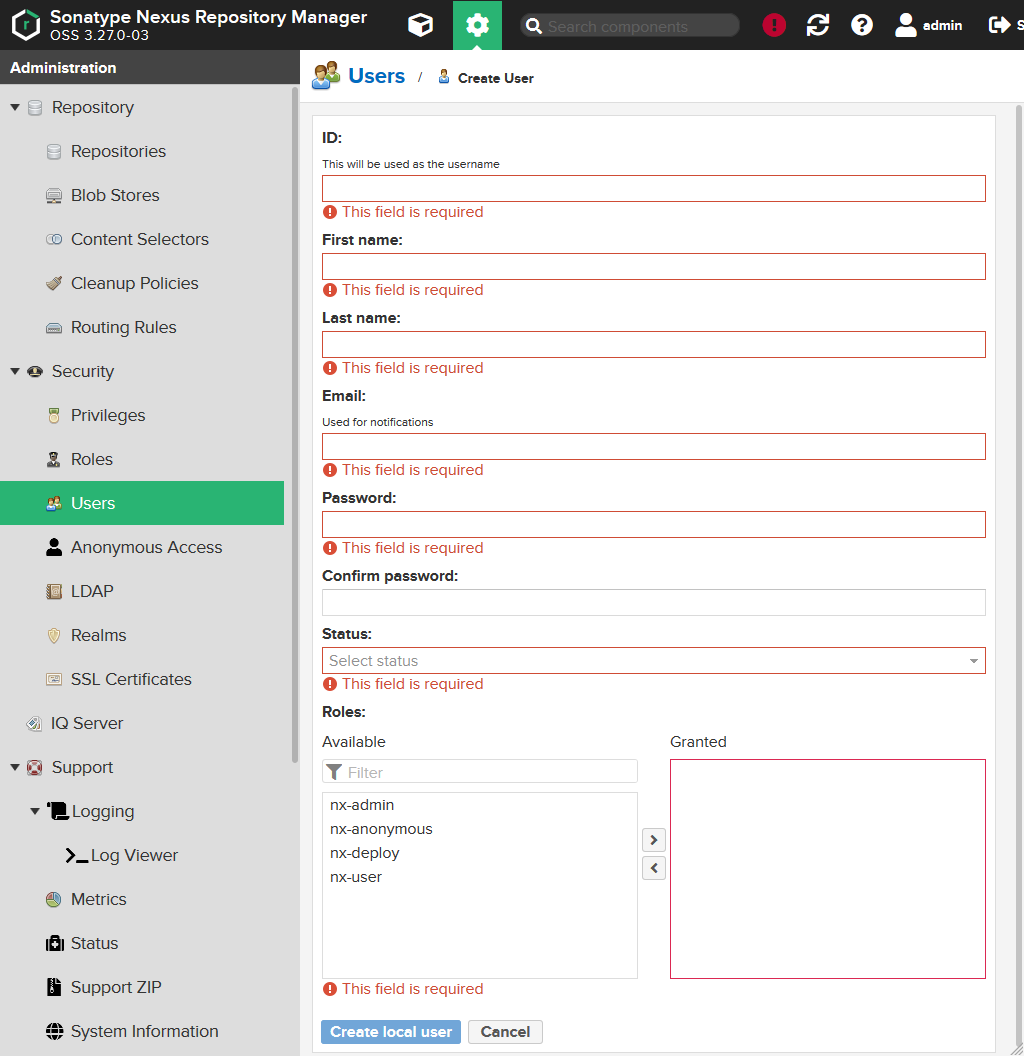
| Field | Description |
|---|---|
ID |
Contains the ID of the user which will be used to log-in. |
First name and Last name |
Those fields contain the real name of the user. If those fields are obtained from the LDAP / Microsoft Active Directory, Nexus will try to split them assuming a First-name last-name format. Means if there is no space, it will write everything to the First name field and leave the Last name field empty. |
Email |
Contains the email address. |
Password and Confirm password |
Contain the password of the user. |
Status |
Controls the current status of the user and can be set to one of the following values: - Active - Disabled |
Roles |
Here you can define which roles the new user should have. |
Press Create local user for creating the user. You will get a notification.
Email address for the anonymous user
It is maybe a good idea to give also the anonymous user an email address. Just click on the entry, change the Email and click on the Save button. You will get a notification.
Roles for the LDAP users
Now is also a good point to give the correct roles to your LDAP users. Filter the list of users by Source and then select LDAP. Open the user by click on its entry. Go down to Roles and add the nx-user role to it. Finally press the Save button. You will get a notification.
If you want that to happen automatically, you can go back to the LDAP configuration and configure a role mapping.
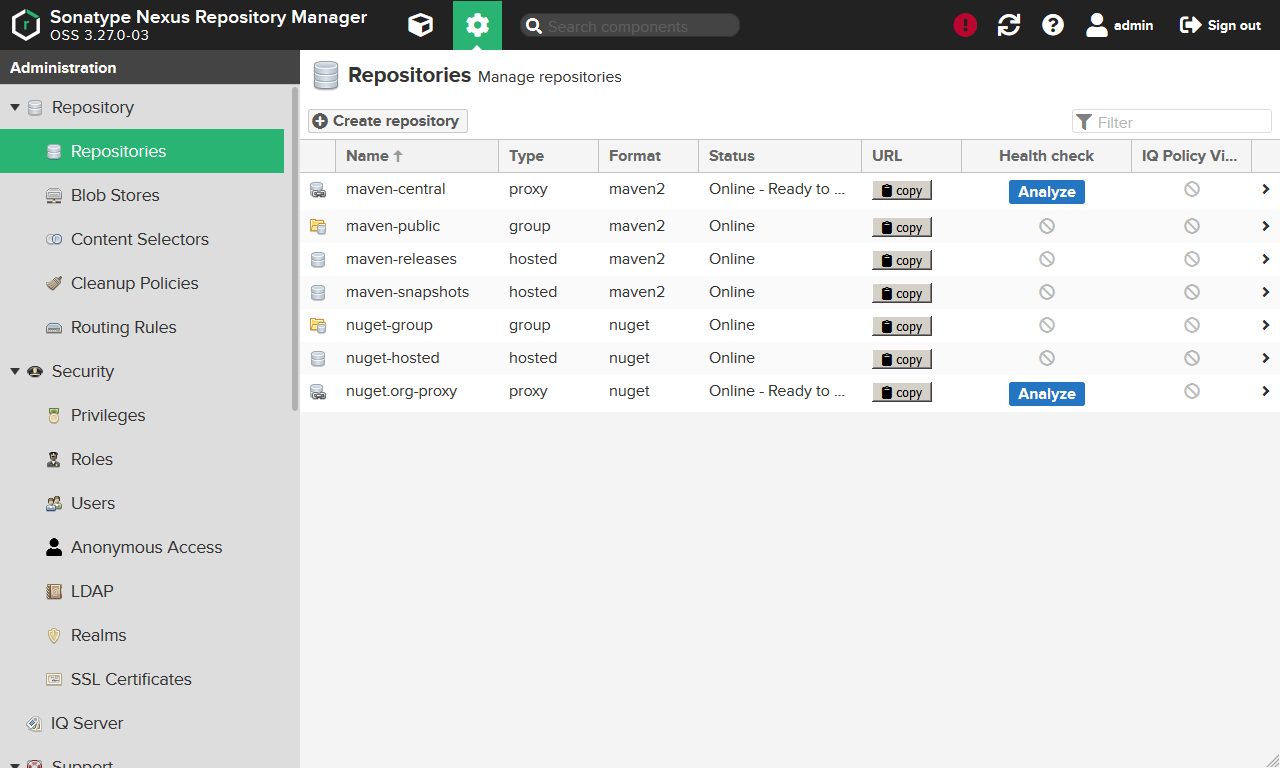
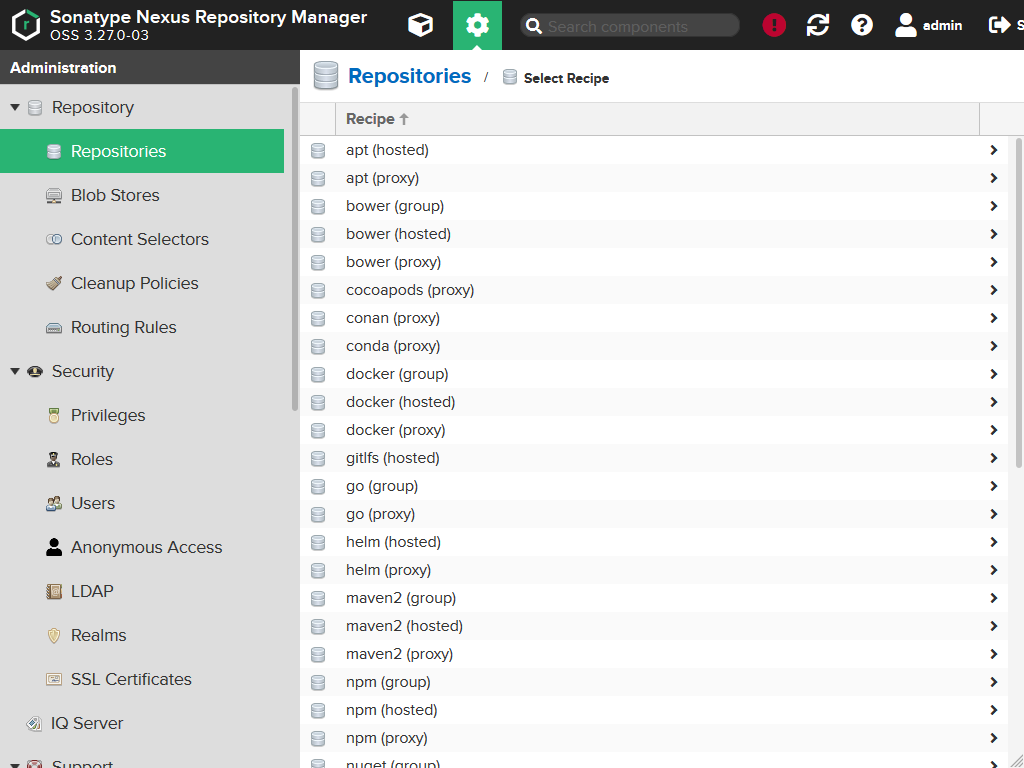
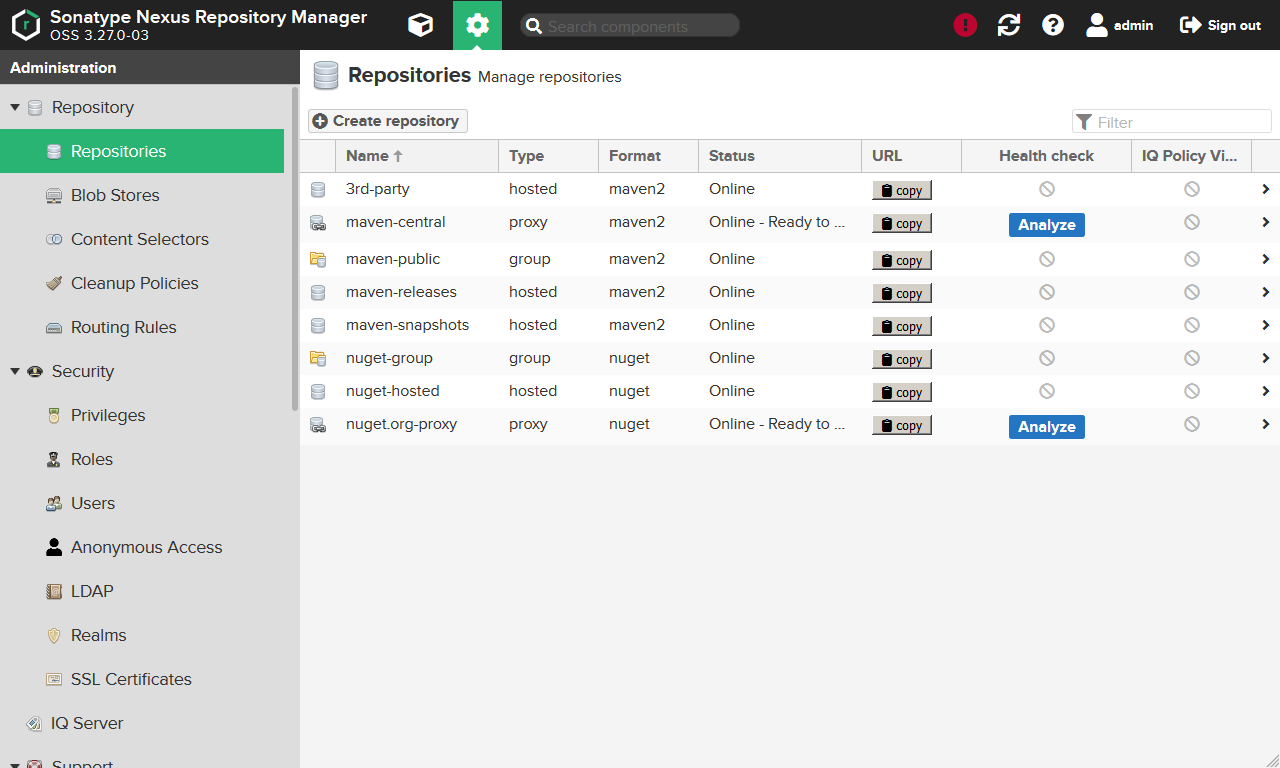
Repositories
Now go to Repository > Repositories. You get a list of all the repositories your Nexus installations knows.
Those can be hosted repositories. These are local repositories and can only be access via your Nexus. You also can upload artifacts to those.
Repositories marked as proxy are public repositories in the Internet (or at least remote repositories). All the artifacts you find here have been downloaded to your Nexus. And if someone requests an artifact through your Nexus, Nexus will - if it can't find it in any of the hosted repositories - will request it from any of those.
Repository which are marked as group simply group repositories of the other types to one. Means you need only one URL to request hosted and remote artifacts. Otherwise your client (e.g. Maven) would need to know all the URLs as every repository has its own.
Let's create a repository for 3rd party artifacts which are not available on the Internet, but should be kept separate from our own artifacts.
Press the Create repository button. You will get a list of different repository types. We go for the maven2 (hosted) as we want a repository accessible by Maven and we wanted a hosted one (means artifacts are stored local and can be uploaded).
In the following form we also have a lot of different options:
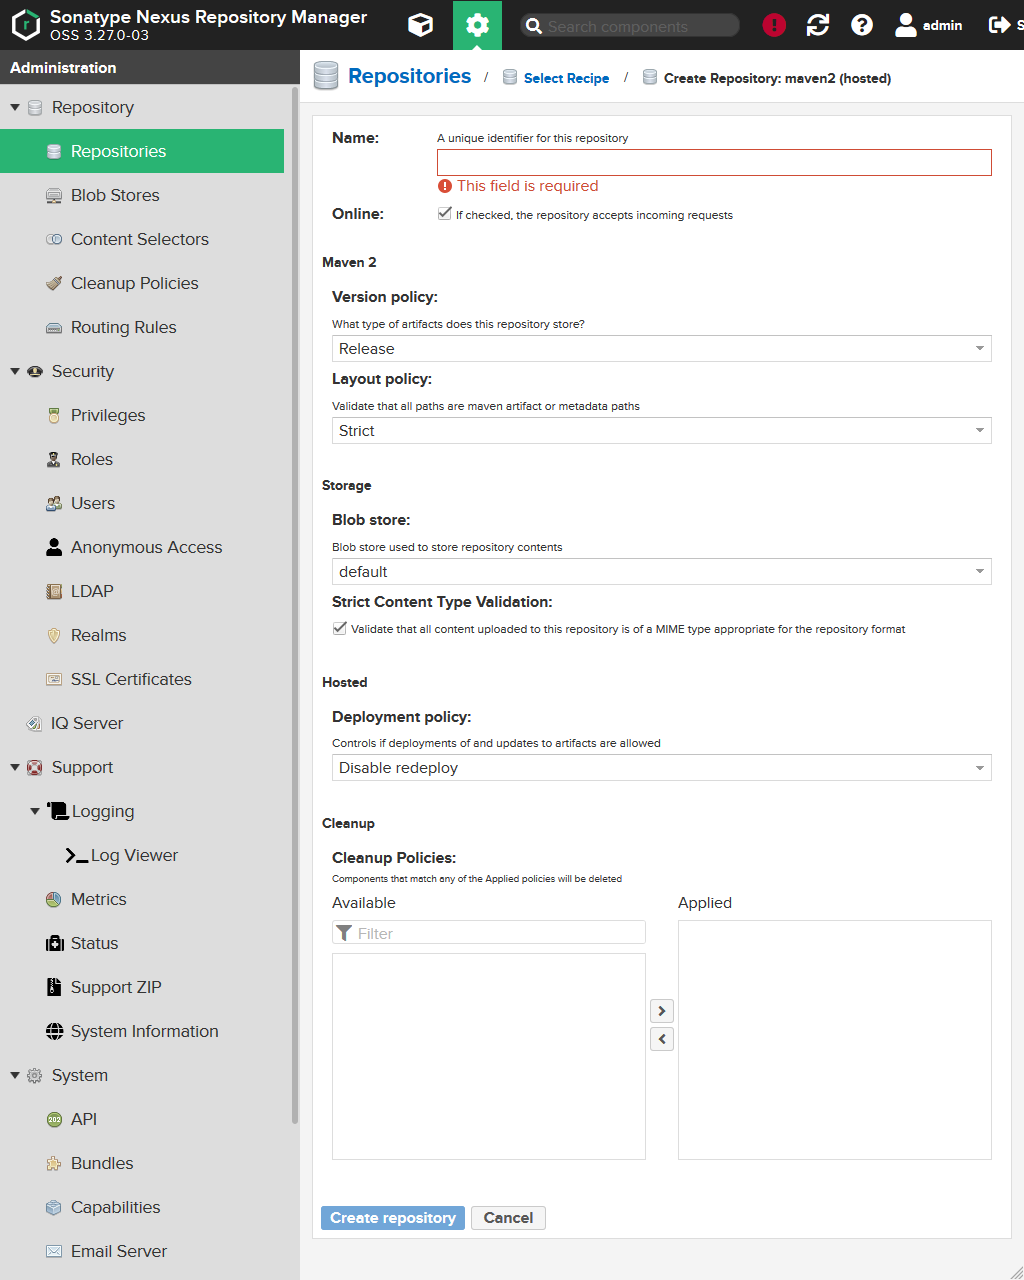
But only a few are really interesting.
| Field | Description |
|---|---|
Name |
Contains the name of the repository. |
Version policy |
Controls if we only can deploy releases (Release), snapshots (Snapshot) or both (Mixed) to the repository. |
Layout policy |
Controls if we have strictly apply to Maven style paths (Strict) or not (Permissive). |
Deployment policy |
Controls if the same artifact can be deployed several times (Allow redeploy), can only deployed once (Disable redeploy) or if artifacts can't be deployed at all (Read-only). |
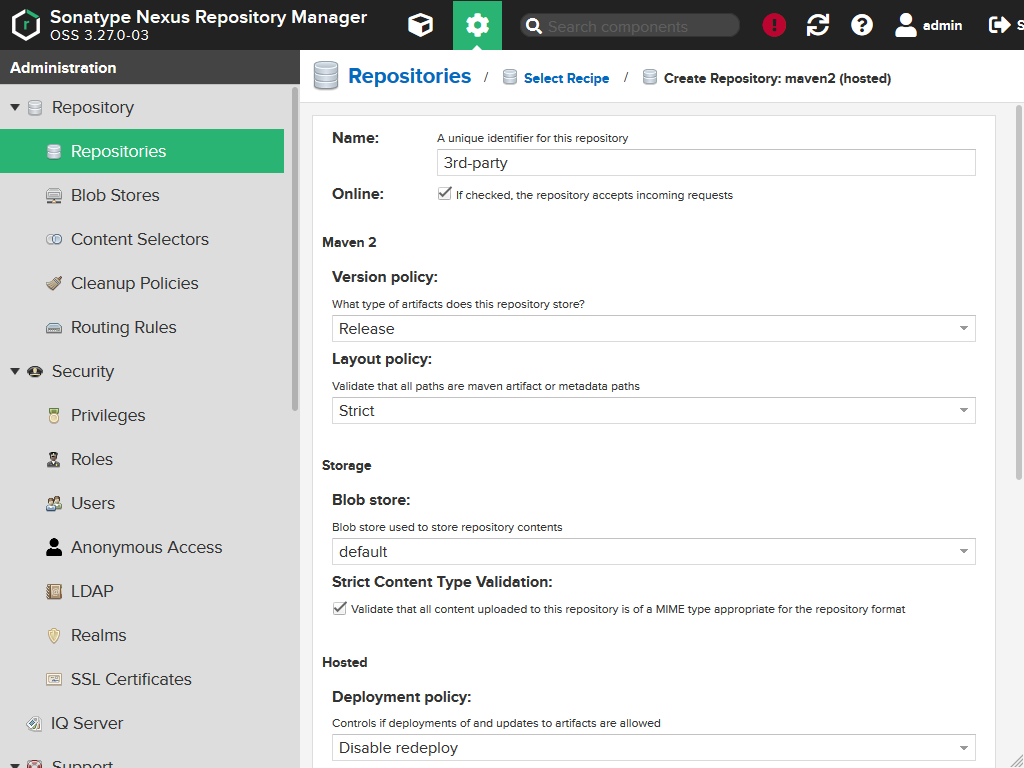
For our 3d party artifacts repository we enter the following values:
| Field | Values |
|---|---|
Name |
3rd-party |
Version policy |
Release |
Layout policy |
Strict |
Deployment policy |
Disable redeploy |
Theoretically even Read-only for Deployment policy would be okay, as 3d party artifacts may only deployed directly via the Nexus web interface and not by a client.
Press the Create repository button. You will get a notification.
In the list you should be able to see our newly created repository.
Now open the maven-public repository (which is marked as type group) by clicking on it.
Here you also the central URL which we will later use to access the repositories. Keep that in mind.
On the end of the form you see the Member repositories field. maven-releases (the hosted repository for artifact releases), maven-snapshots (the hosted repository for artifact snapshots) and maven-central (the proxy repository for remote artifacts from the Internet) are already part of the group.
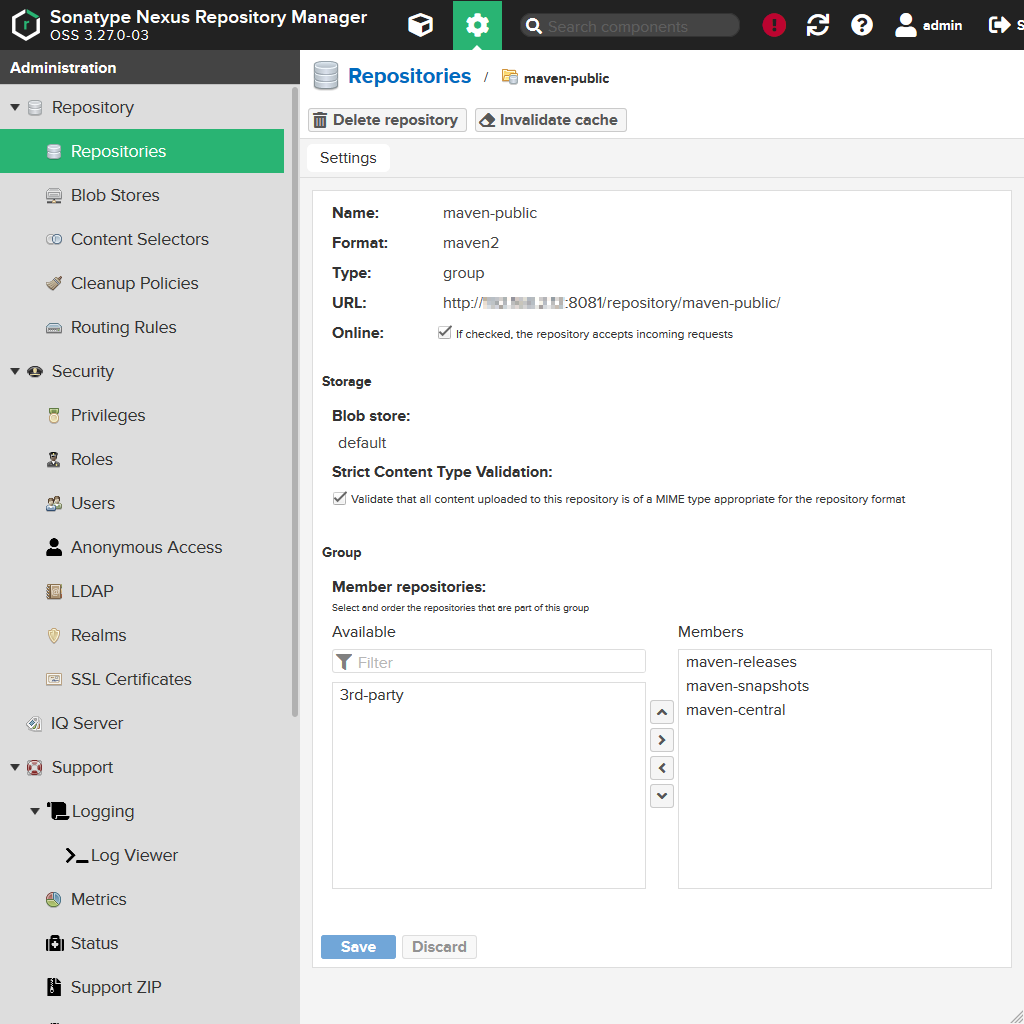
So let's add out 3d-party repository to the group and give it a higher priority than the maven-central repository.
Finally press the Save button. You will get a notification:

When you back to the overview over the repositories you should also click on the maven-releases and maven-snapshots repositories, so you can see their URLs as we need them later for configuring Maven.
By default those are:
http://[NEXUS-ADDRESS]:[NEXUS-PORT]/repository/maven-releases/
for the maven-releases repository and
http://[NEXUS-ADDRESS]:[NEXUS-PORT]/repository/maven-snapshots/
for the maven-snapshots repository, where [NEXUS-ADDRESS] and [NEXUS-PORT] are the address and port of your Nexus installation.
Attention! If you have configured the web port how I described, that other port (e.g. port 80) won't show up here as Nexus doesn't know anything about it. Still the repositores can also be accessed via that port.
Maven configuration
General configuration
You have to configure the repositories of Nexus also in your Maven's settings.xml:
<?xml version="1.0" encoding="UTF-8"?>
<settings xmlns="http://maven.apache.org/SETTINGS/1.0.0"
          xmlns:xsi="http://www.w3.org/2001/XMLSchema-instance"
          xsi:schemaLocation="http://maven.apache.org/SETTINGS/1.0.0 http://maven.apache.org/xsd/settings-1.0.0.xsd">

  <!-- Content of your settings.xml -->

  <servers>
    <server>
      <id>nexus</id>
      <username>[USERNAME]</username>
      <password>[PASSWORD]</password>
    </server>
    <server>
      <id>releases</id>
      <username>[USERNAME]</username>
      <password>[PASSWORD]</password>
    </server>
    <server>
      <id>snapshots</id>
      <username>[USERNAME]</username>
      <password>[PASSWORD]</password>
    </server>
  </servers>

  <mirrors>
    <mirror>
      <id>nexus</id>
      <mirrorOf>*</mirrorOf>
      <name>Nexus Repository</name>
      <url>http://[NEXUS-ADDRESS]:[NEXUS-PORT]/repository/maven-public</url>
    </mirror>
  </mirrors>

</settings>
The server elements contain the credentials for the different servers, also including the repositories. The id can be freely chosen, as long as it is unique. It will be later referenced in the pom.xml of your Maven projects.
Replace [USERNAME] and [PASSWORD] by the user and password you defined in Nexus. If you created a local user in Nexus, you have to use those credentials. If you want to use a LDAP user, use the ID and password of this one.
The mirror elements contain the artifact proxies. The id can be freely chosen, same applies for the name. mirrorOf should always be *, so all request are going through that proxy.
If your mirror needs credentials, you have to have a matching server element (means the id value must be the same).
Also here [NEXUS-ADDRESS] and [NEXUS-PORT] have to be replaced by your actual configuration. If you have configured the web port, you also can use that port. If that port is 80, you can omit it as it is the HTTP standard port.
As you may have noticed: The url of our mirror points towards the maven-public repository which was of type group. If we wouldn't have grouped our repository using that, we would have now to specify a mirror for each of the repositories.
See the "Maven - Settings Reference" in the Sources section for more information.
Project configuration
In the pom.xml of your project you can define where artifacts should be deployed. So let's add the repositories:
<project xmlns="http://maven.apache.org/POM/4.0.0" xmlns:xsi="http://www.w3.org/2001/XMLSchema-instance"
    xsi:schemaLocation="http://maven.apache.org/POM/4.0.0 http://maven.apache.org/xsd/maven-4.0.0.xsd">
    <modelVersion>4.0.0</modelVersion>

    <!-- Here your POM content follows -->

    <distributionManagement>
        <repository>
            <id>releases</id>
            <url>http://[NEXUS-ADDRESS]:[NEXUS-PORT]/repository/maven-releases</url>
        </repository>
        <repository>
            <id>snapshots</id>
            <url>http://[NEXUS-ADDRESS]:[NEXUS-PORT]/repository/maven-snapshots</url>
        </repository>
    </distributionManagement>

</project>
The id has to match the id in the settings.xml we configured before. This way Maven knows which credentials it should use.
Also here [NEXUS-ADDRESS] and [NEXUS-PORT] have to be replaced by your actual configuration. If you have configured the web port, you also can use that port. If that port is 80, you can omit it as it is the HTTP standard port.
If you build your project now using the deploy target, Maven should deploy the resulting artifact(s) to the corresponding repository.
You might put that configuration also in your company's central parent POM file, so it gets inherited by all projects and doesn't have to be defined over and over again.
Conclusion
Setting up a Nexus repository manager might seems complicated at first. But it isn't. And its configuration normally doesn't much over time.
If you're working e.g. with Maven and have different teams, it becomes as necessity. Maybe the bandwidth saving aspect alone wouldn't justify the time and effort. At least not nowadays.
Sources
- Download Nexus Repository OSS
- Nexus Repository Manager 3 - Release Notes
- Download Archives - Repository Manager 3
- Nexus Repository Manager 3 - Installation
- Initial Setup - High Availability - Node Deployment Steps for High Availability - First Node
- stackoverflow: How to run nexus sonatype on port 80?
- Saving Iptables Firewall Rules Permanently
- Using Nexus 3 as Your Repository - Part 1: Maven Artifacts
- Maven - Settings Reference